Best PC Gaming Accessory: Monitor Mounts
Posted by Josh Soupir on Mar 23rd 2018
I get it, when you think of gaming accessories you're imagining some cool speakers or a mechanical keyboard. But, something most gamers don't think about is adding a monitor mount to their setup. Hear me out, mounting your monitor gives you nearly infinite monitor adjustments for more comfortable and longer gaming sessions. On top of that, you'll reclaim desk space and have room to add more to your battlestation. It's time to upgrade your entire gaming setup by adding a monitor mount.
Now I'mma keep it 100 with you, we just launched a line of monitor mounts specifically for gamers so of course we want you to get one. But we wouldn't have made these bad boys if we didn't believe in the benefits. Our engineers are gamers and put their sweat and tears into making sure these monitor mounts are up to snuff (plus got to play video games on the job). From the top-notch build quality to butter-smooth adjustability, an Echogear monitor mount is one of the most value-packed gaming accessories you can buy. We've got mounts for single, dual, and even triple monitor setups...because 3 screens are better than one. It's science.
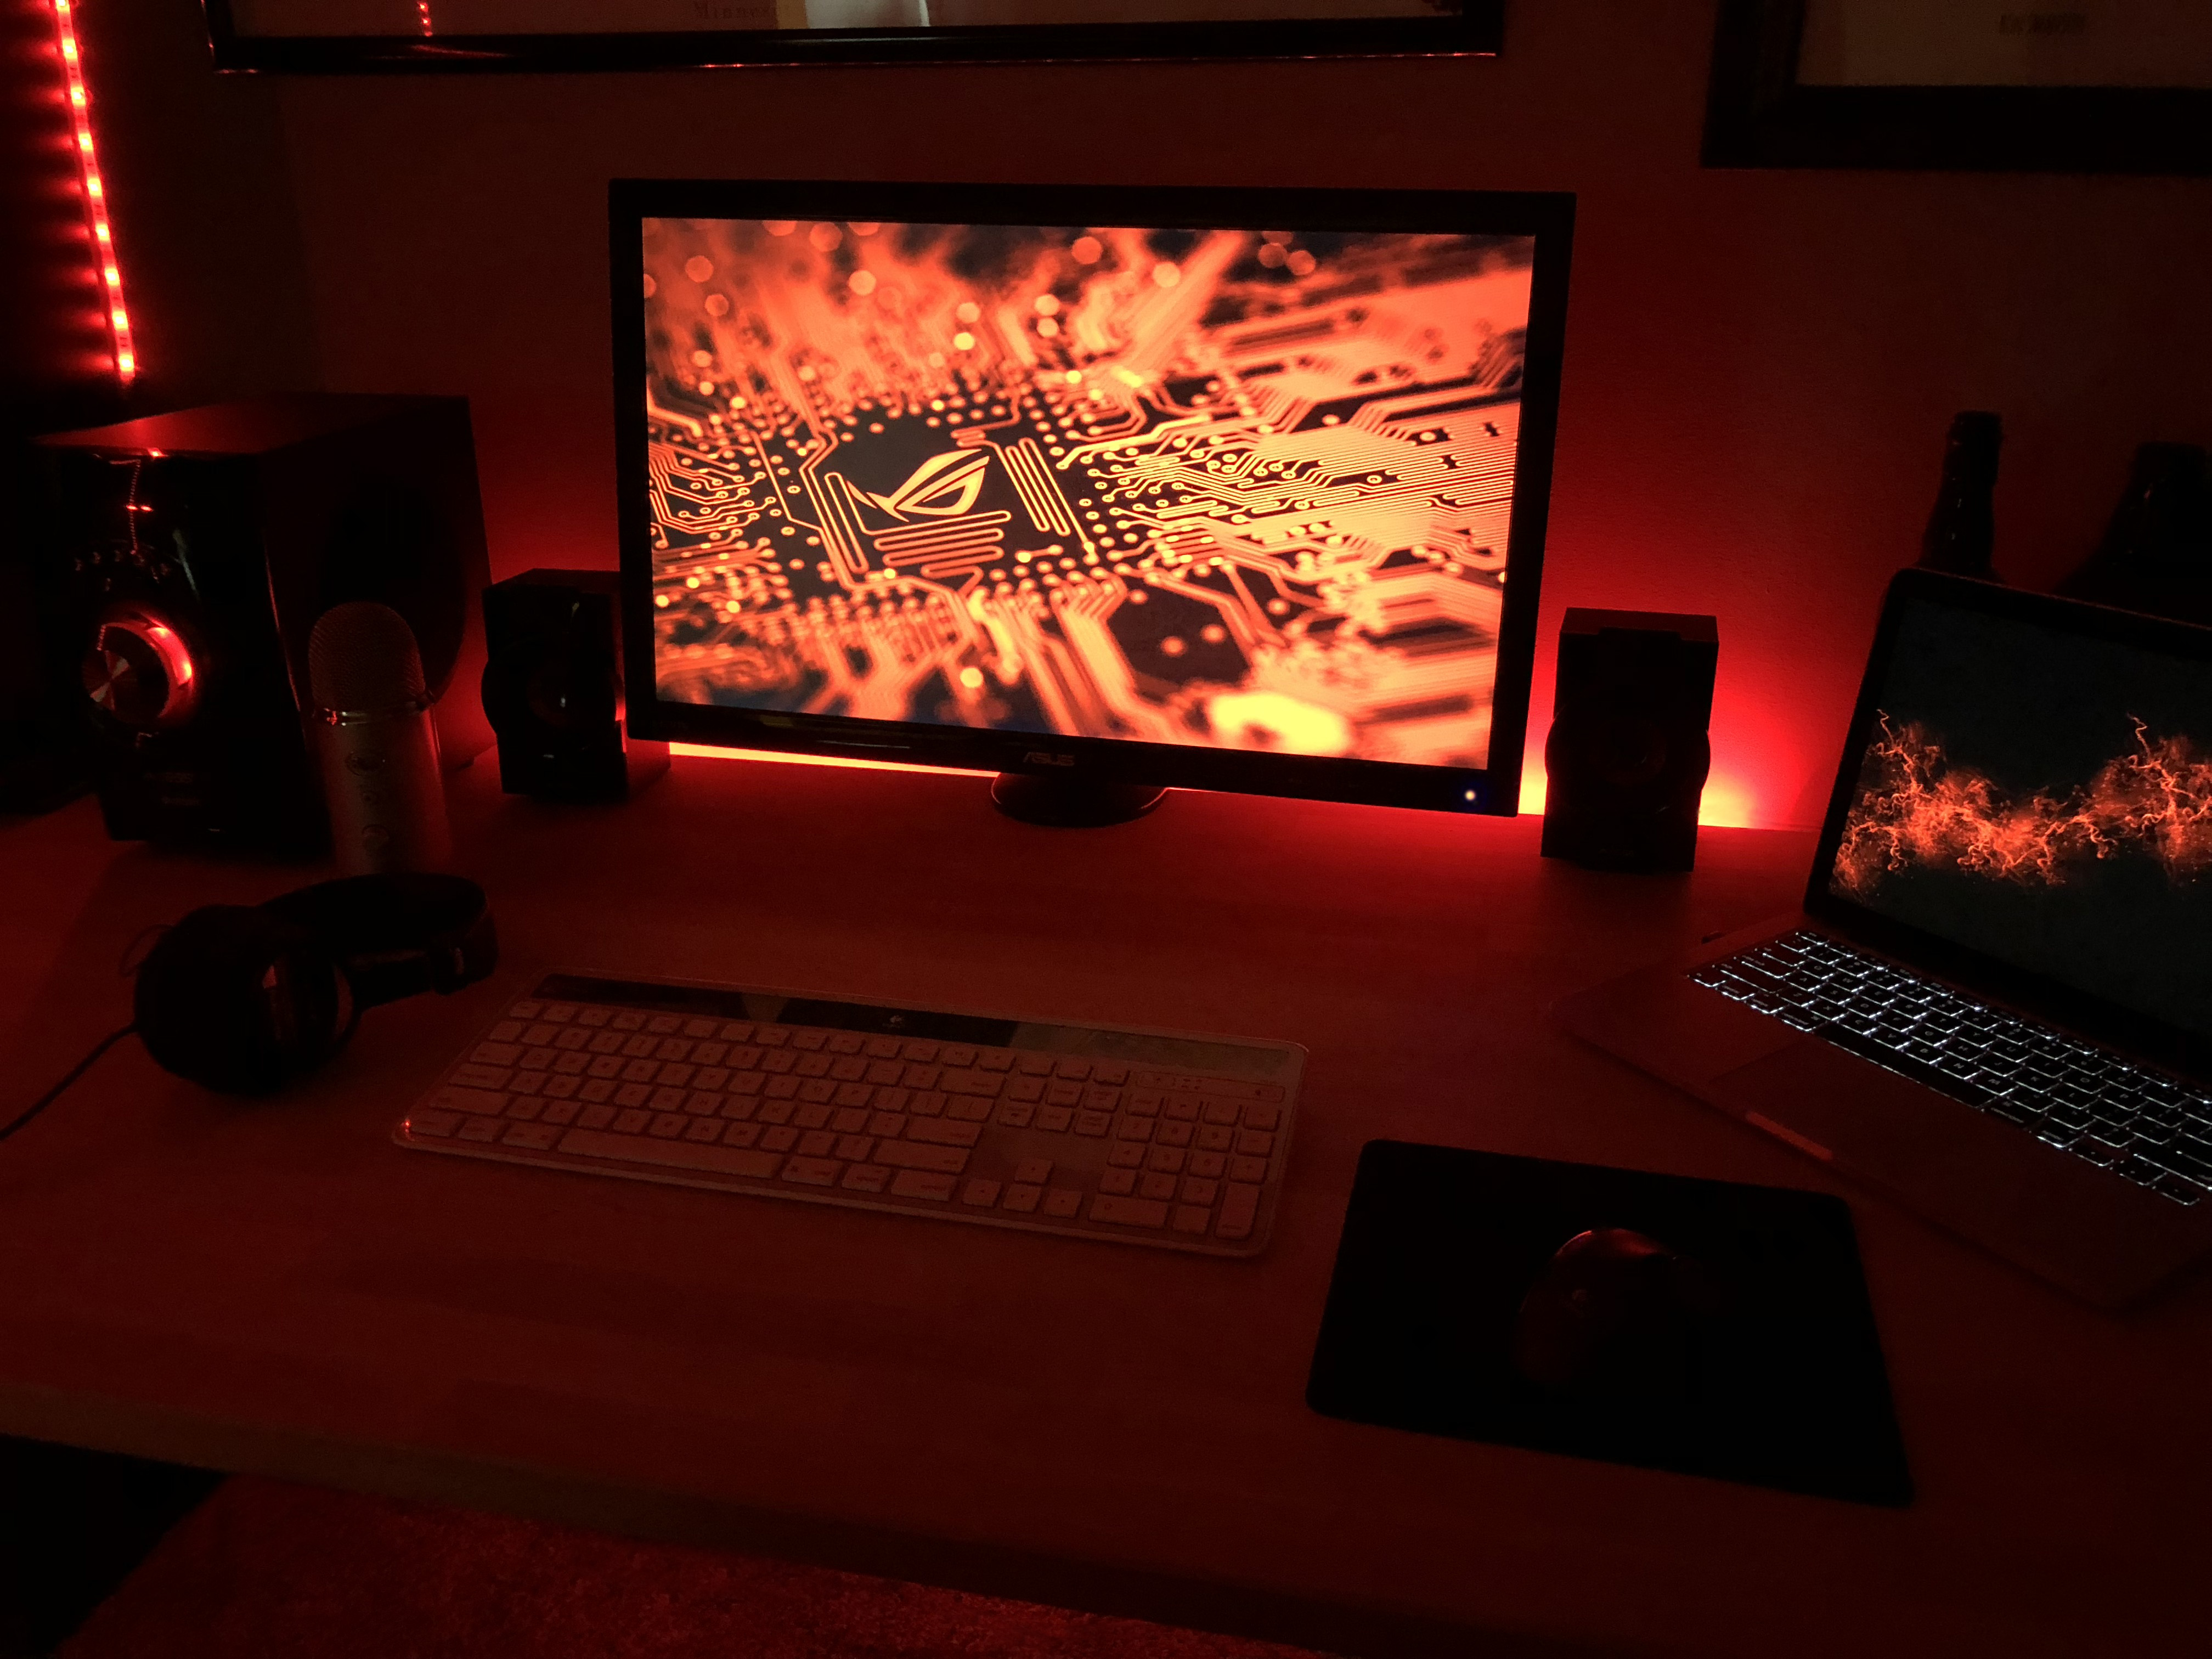
How do I know they work? Well, I snuck one home to install on my desk and the results speak for themselves:
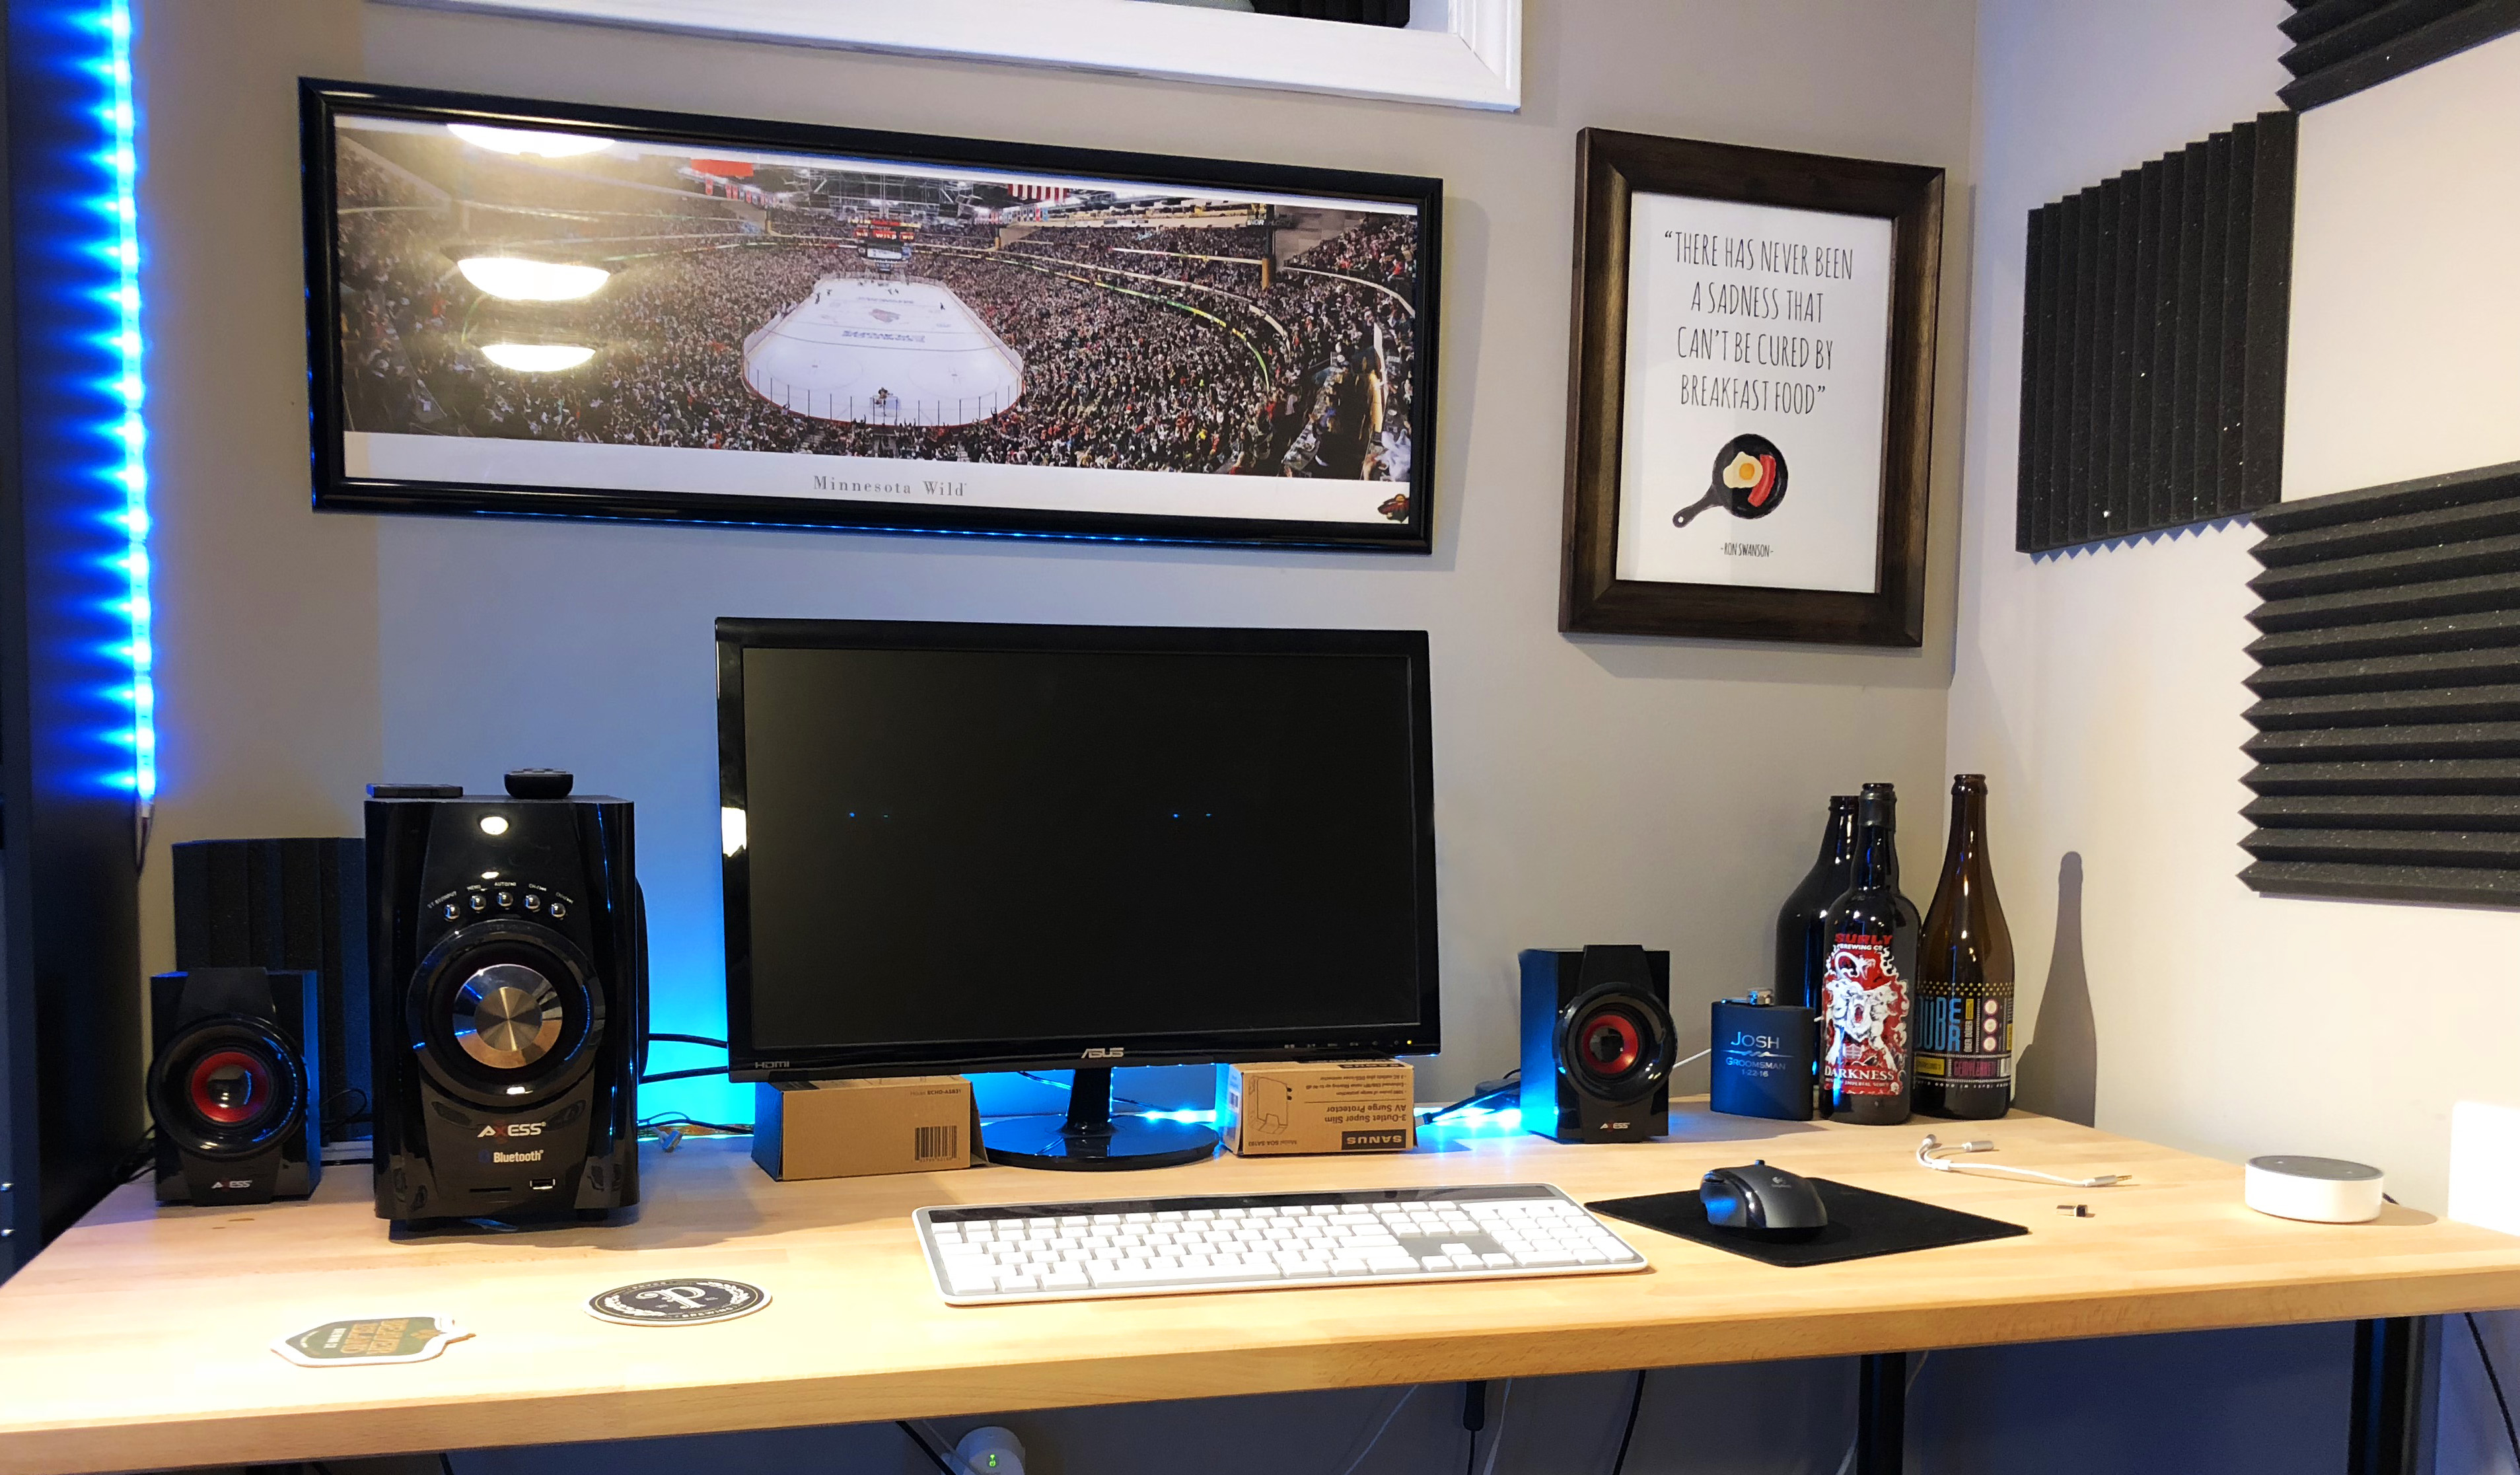
Before
After:
I mean, the before photo was pretty weak. I had boxes under the edges of my monitors to limit screen wobble and damn is it ugly! As a bonus, adding a monitor mount means no more screen wobble, no matter how many screens you mount. Save the wobble for the club. V.I.C. will be proud. Combine that with the lack of cable management and you've got a setup that can only be described in technical terms as "weak sauce".
Below is the step by step install, but first, here's everything I used to make my PC setup respectable:
1. Monitor Mount
With only 1 screen, I choose between the single articulating arm and the dynamic gas spring arm (desk or wall mounted). Since we'll occasionally have karaoke parties in my basement, the dynamic height adjustment was important so I went with our GM1FC desk mounted gas spring monitor mount.
2. Cable Clips
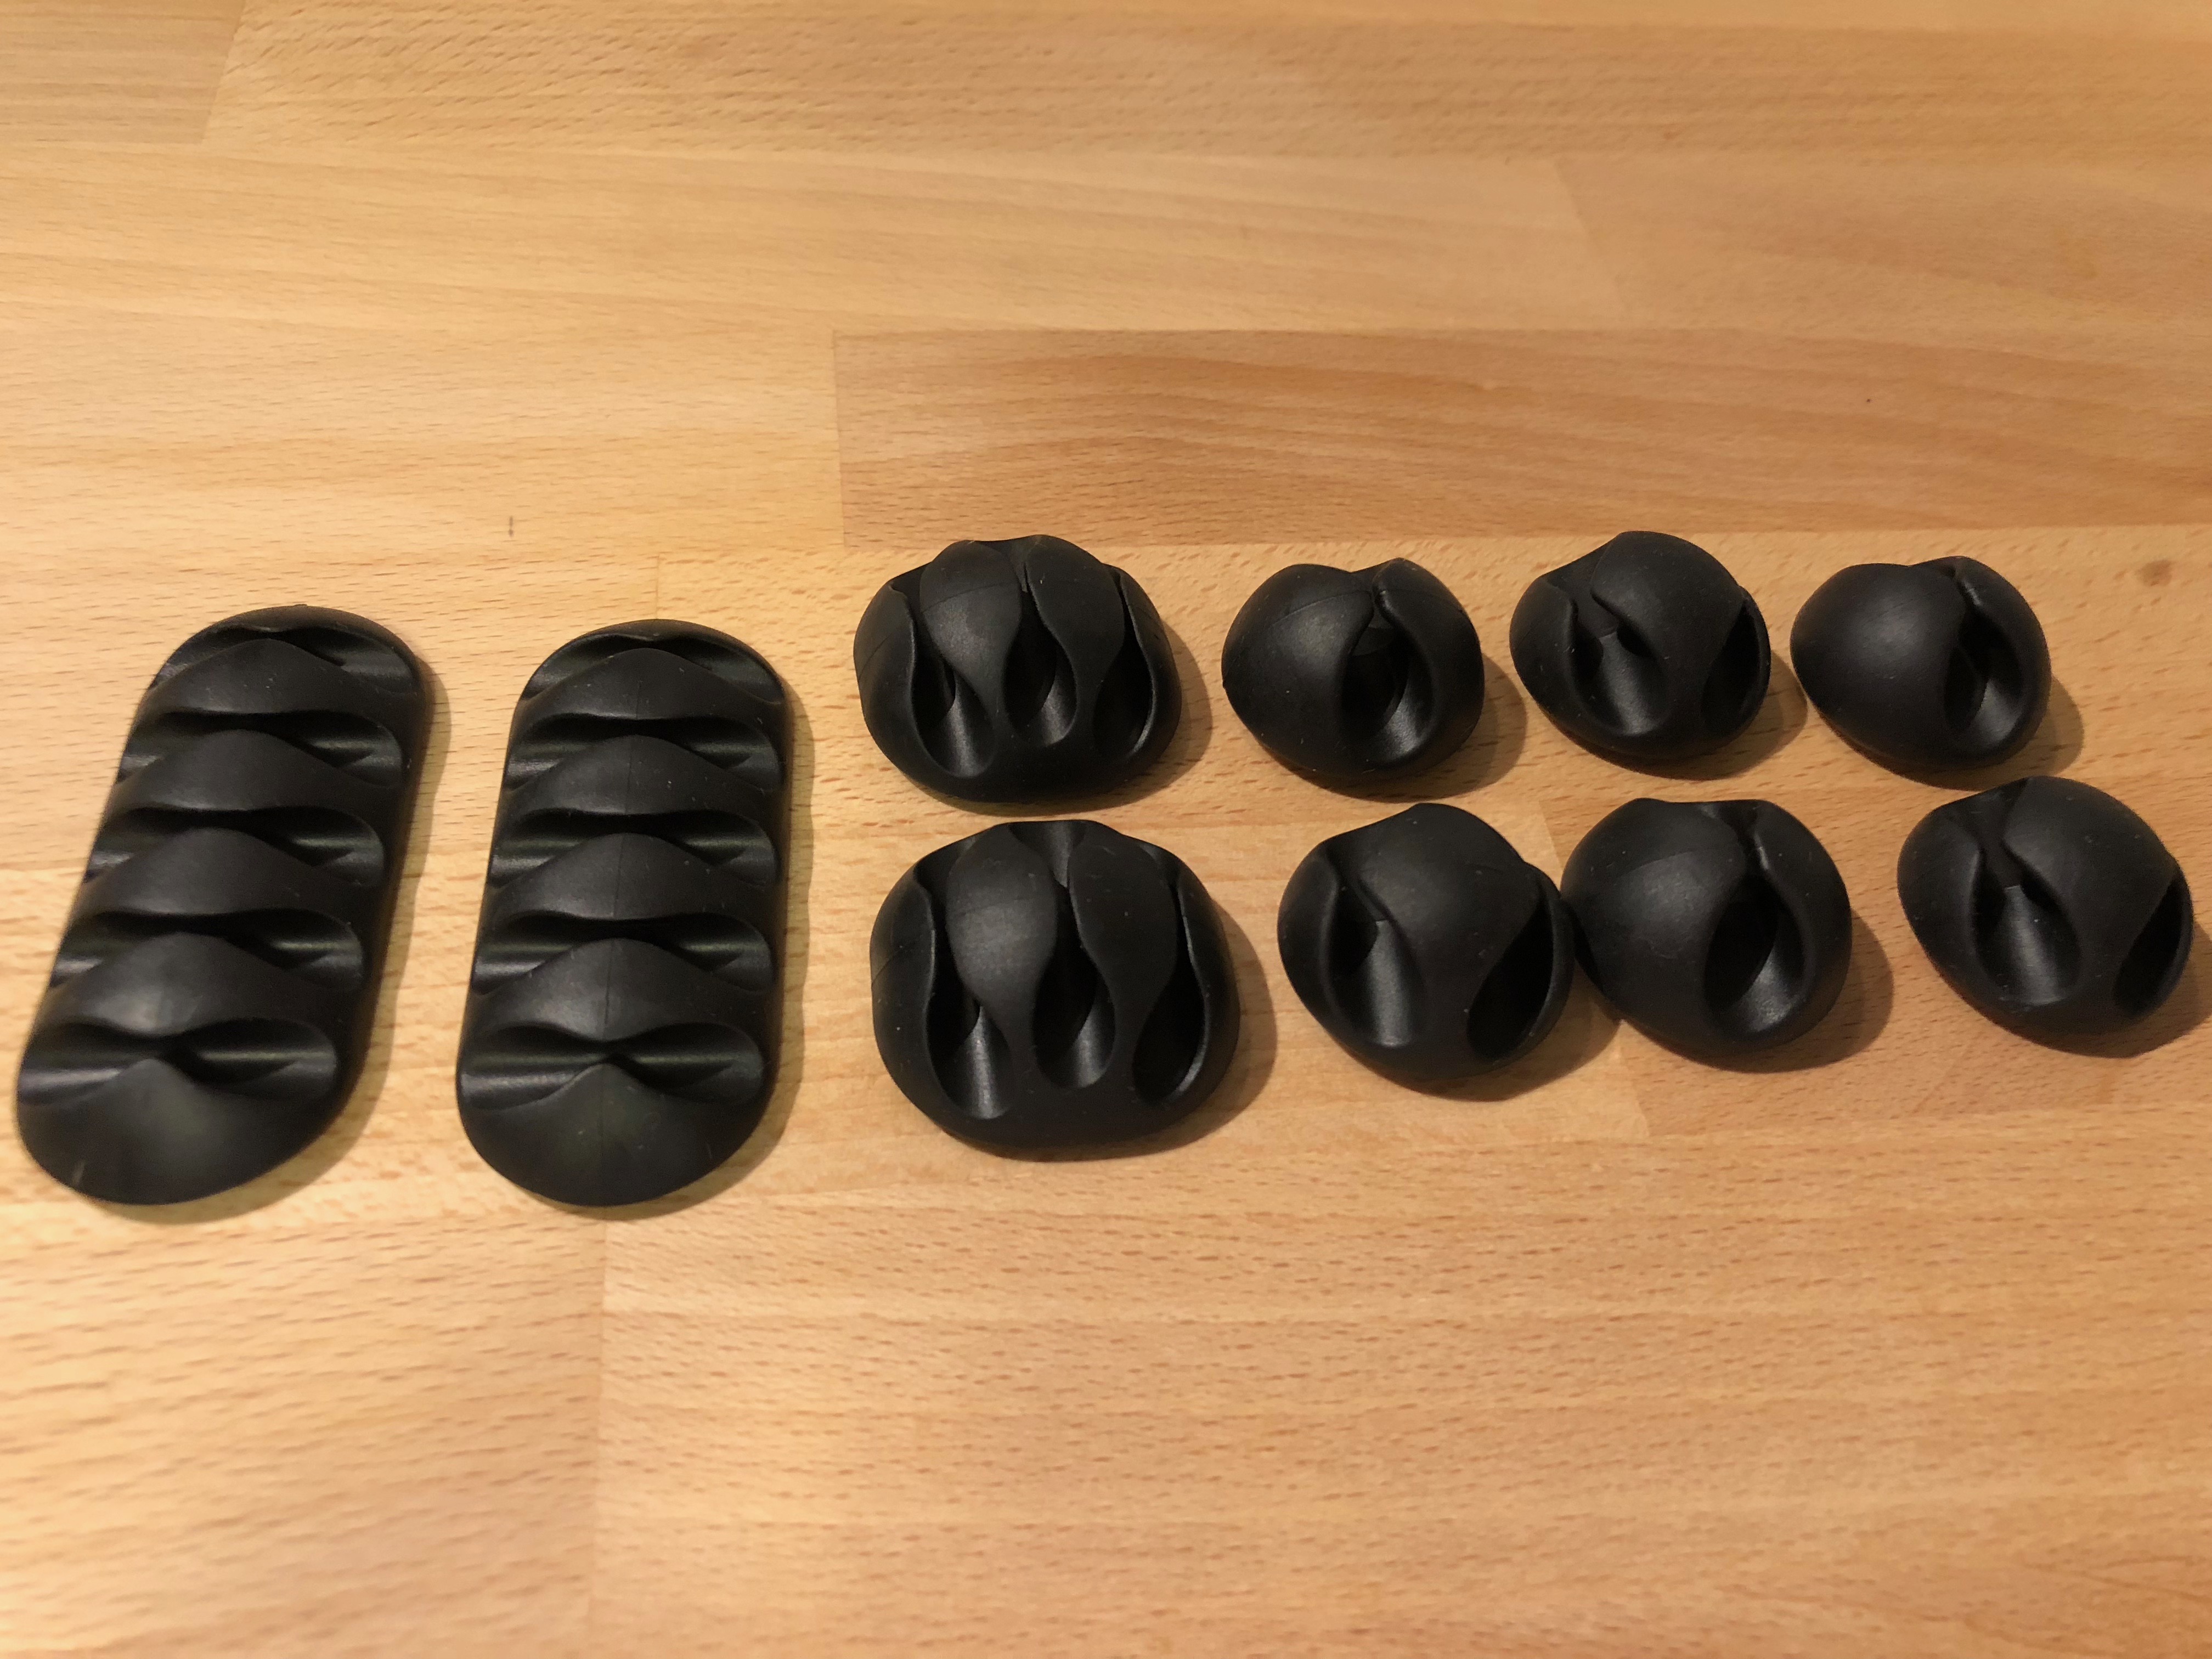
In order to give my setup a clean, finished look, I needed to upgrade my cable management game. You can find a myriad of products on Amazon, but this set of cable clips is pretty sweet. Apparently, the brand is called "Early Buy" but they're cheap and work well so who cares. It comes with 10 pieces of all different sizes to handle single or multiple cables each. They have a peel-off adhesive on the back and can stick anywhere you need them. 10/10 would recommend.
3. Cable Sleeve
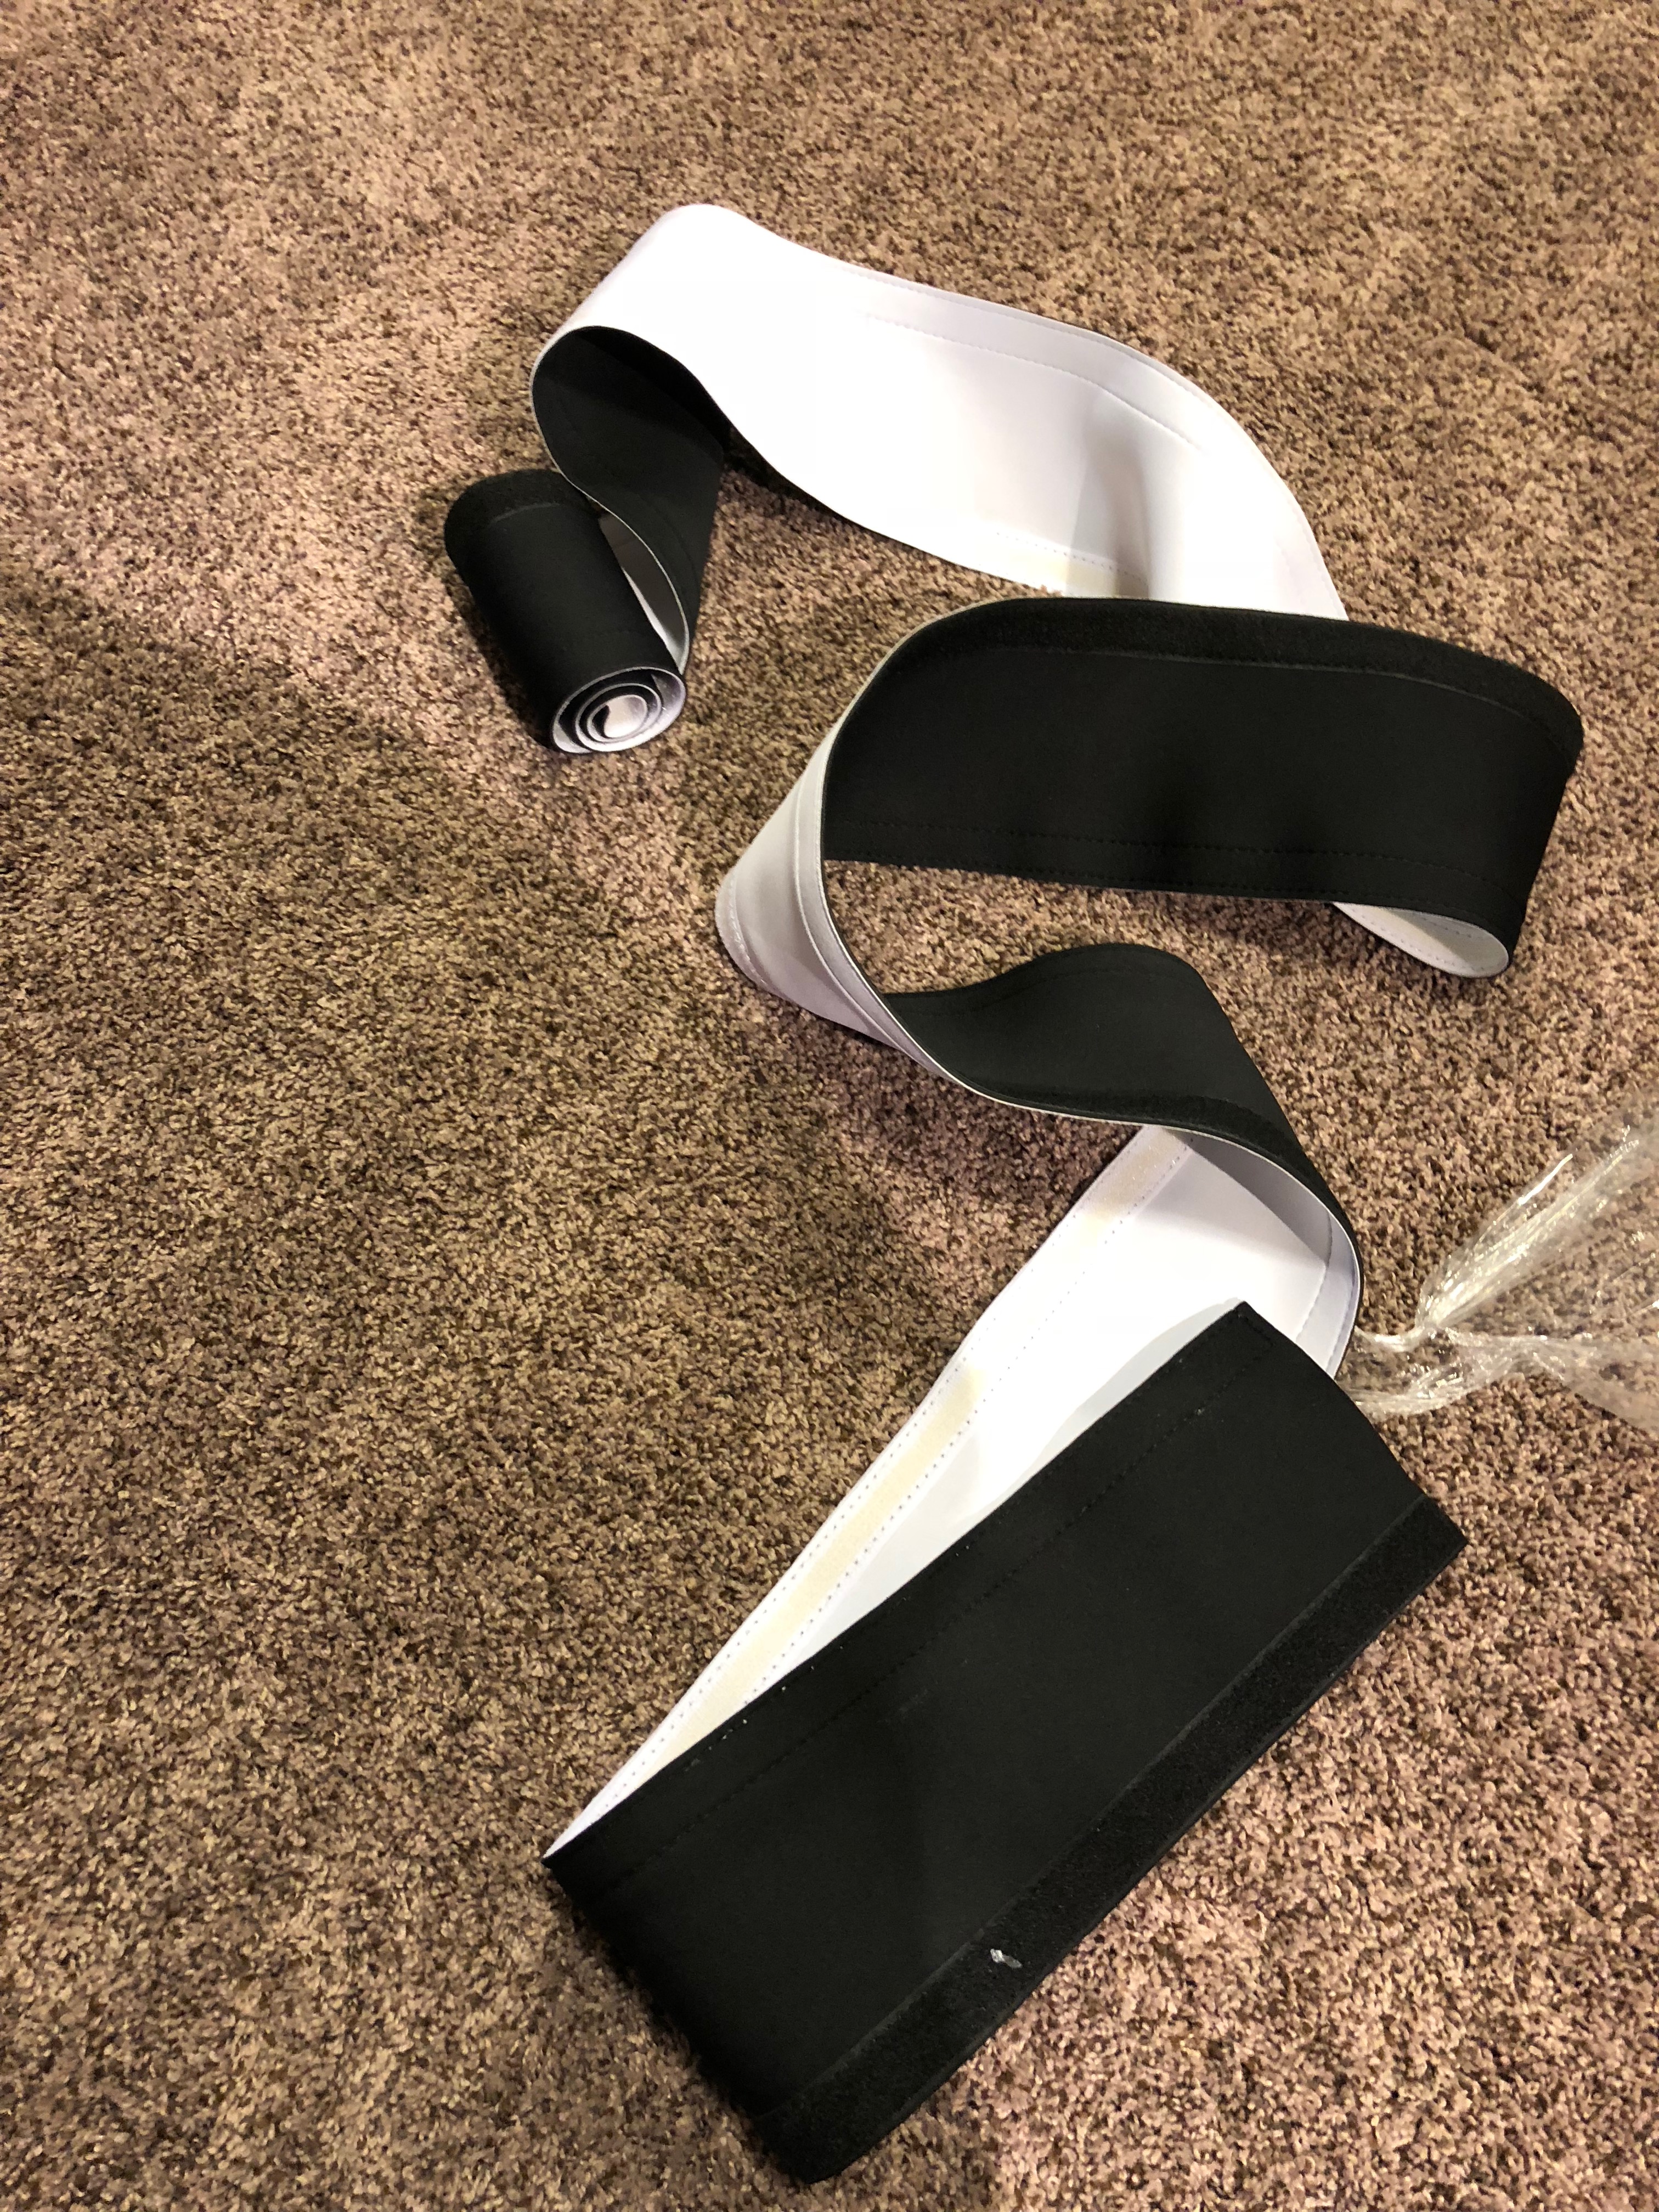
Under my desk was a complete mess. To start fixing that I used a cable sleeve from Kootek to wrap and contain all the cords. It's reversible between black and white and is really easy to use. Cut it to any length and wrap multiple cords. Pair with an adhesive or zip ties and you can attach it to the back of a desk leg to class it up a bit. I've never used something like this before, but for $12 it was worth the risk.
And that's all I needed.
Despite my lack of handyman skills, upgrading my setup with the mount and cable management took about an hour. Not a bad investment for the results. Who knows, I might be excited to do work now. Or maybe I'll just throw back and play Age Of Empires II. I'll crush anyone with the Spanish. Here's the install process:
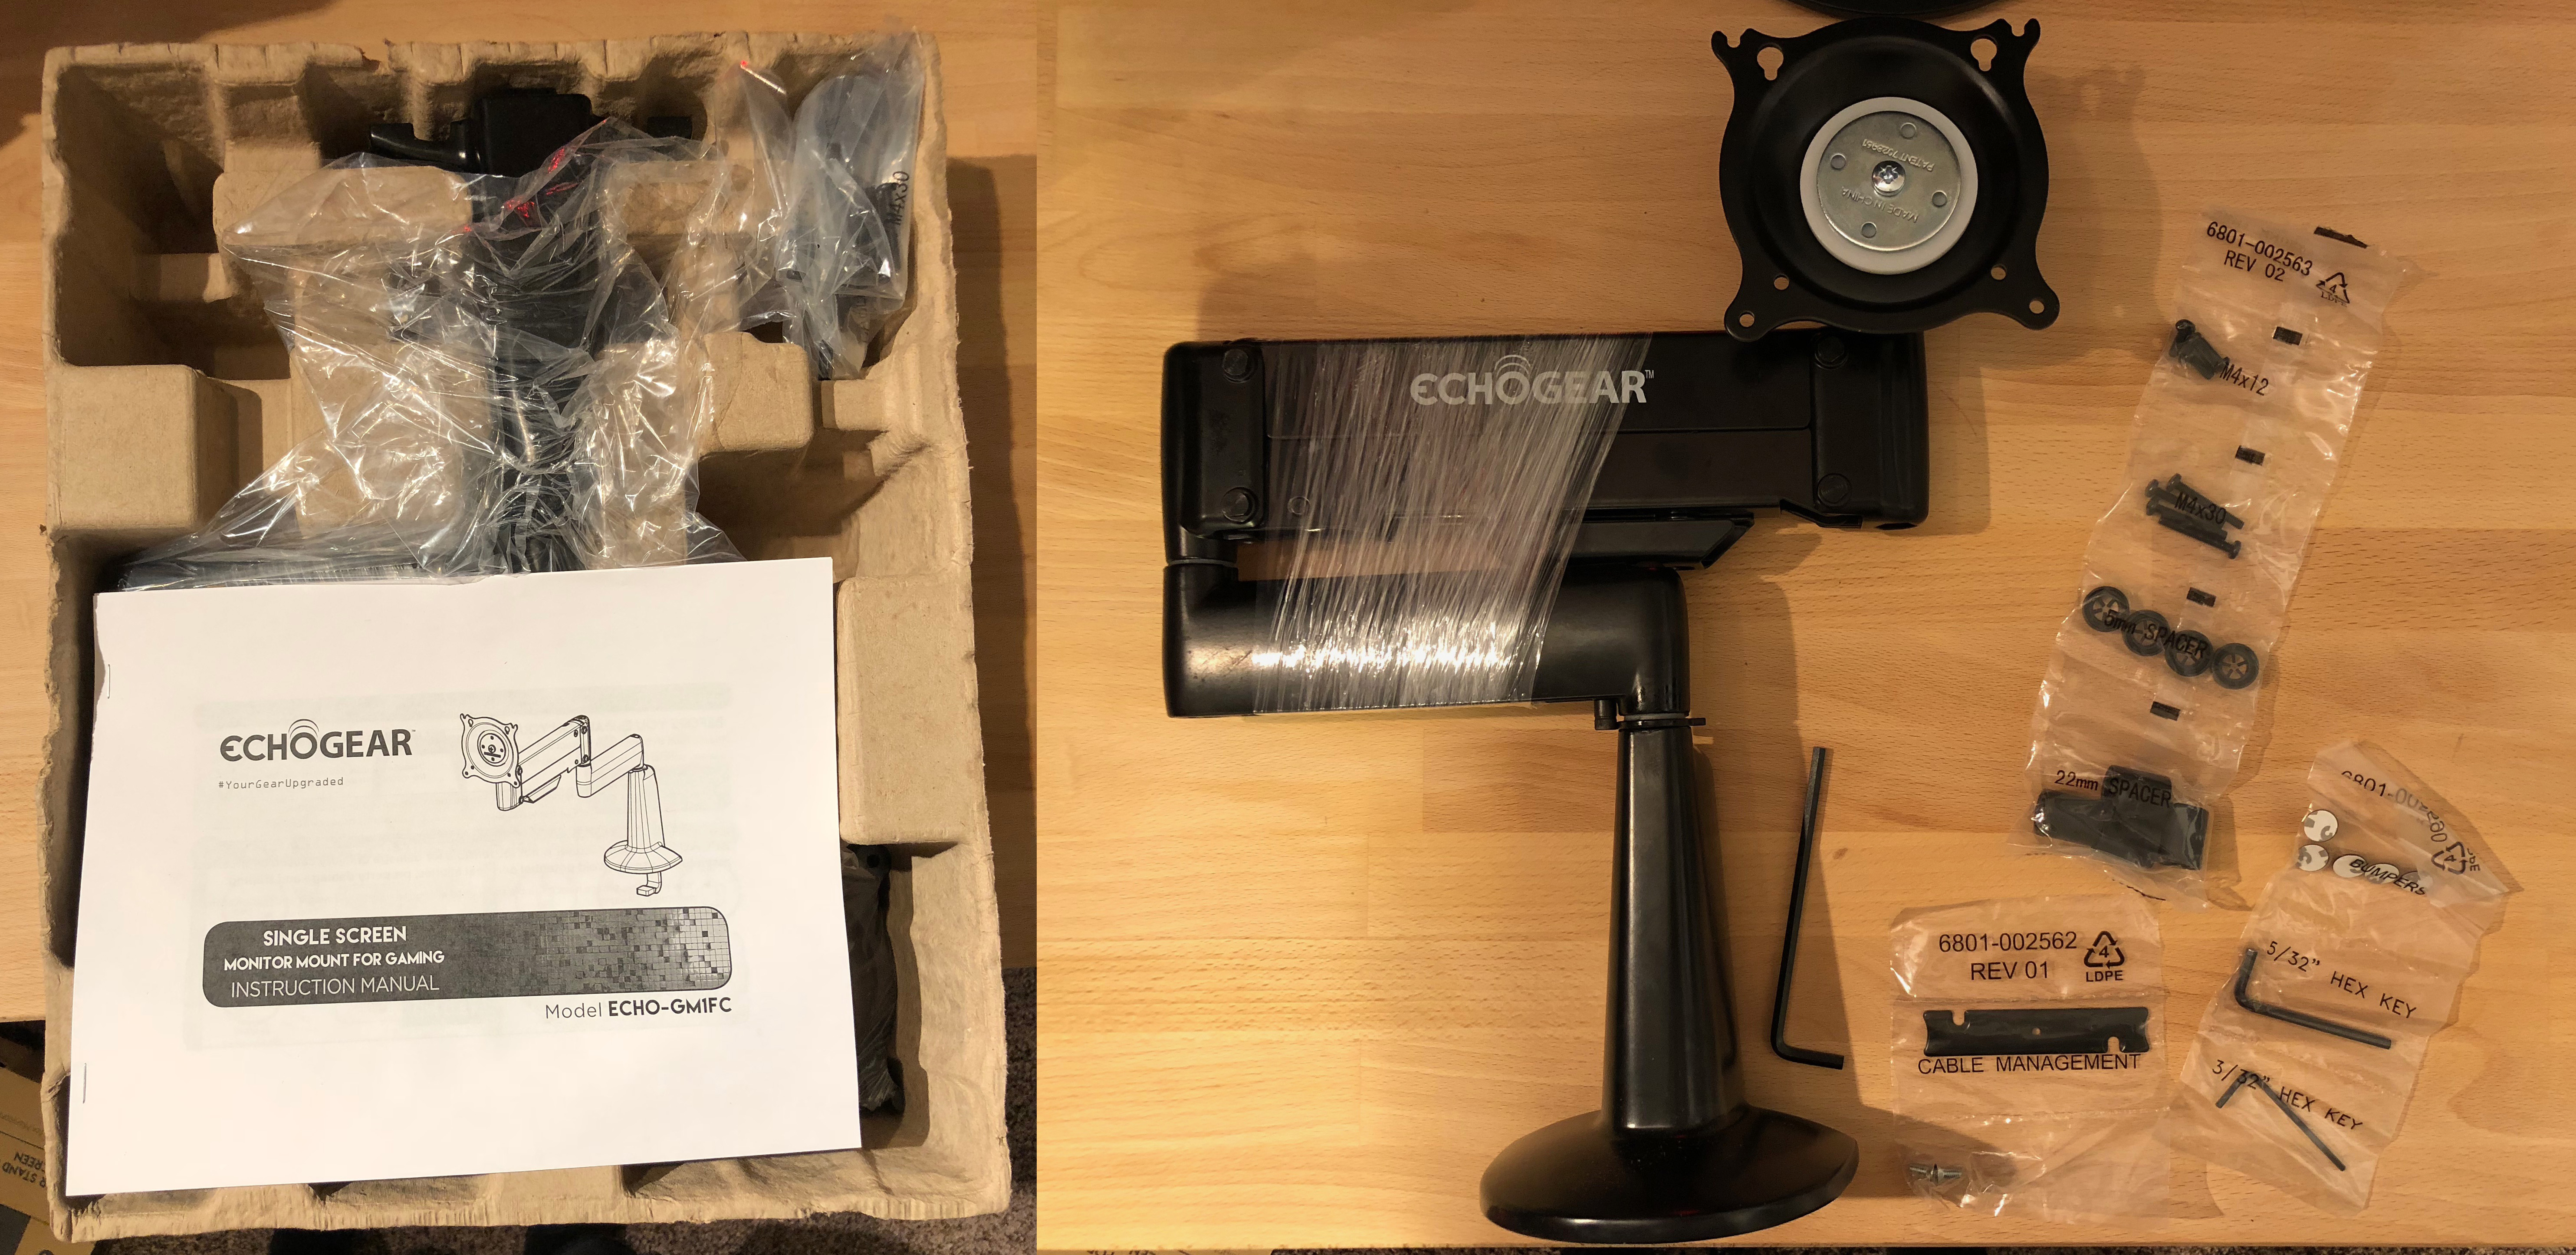
Unboxing
Mounting my monitor turned out to be the easiest thing I've ever done because of how it comes packed. There's literally an install manual, the mount, and a bag of hardware. That's it. No puzzles or complicated parts to assemble. Even my mediocre DIY skills were more than enough for this project. On top of the end results, I got to feel cool succeeding on the first try. Despite her eye roll, I know my wife was super impressed.
Step 1: Attach The Mount To The Desk
Clamping the monitor onto your desk is crazy easy. No hyperbole here grammar police. Just use the included hex key to loosen the clamp enough to slide onto the desk, then tighten it back up. Just make sure it is centered or positioned where you want the screen. Do this step before attaching the monitor so it's easier to move around to the perfect spot.
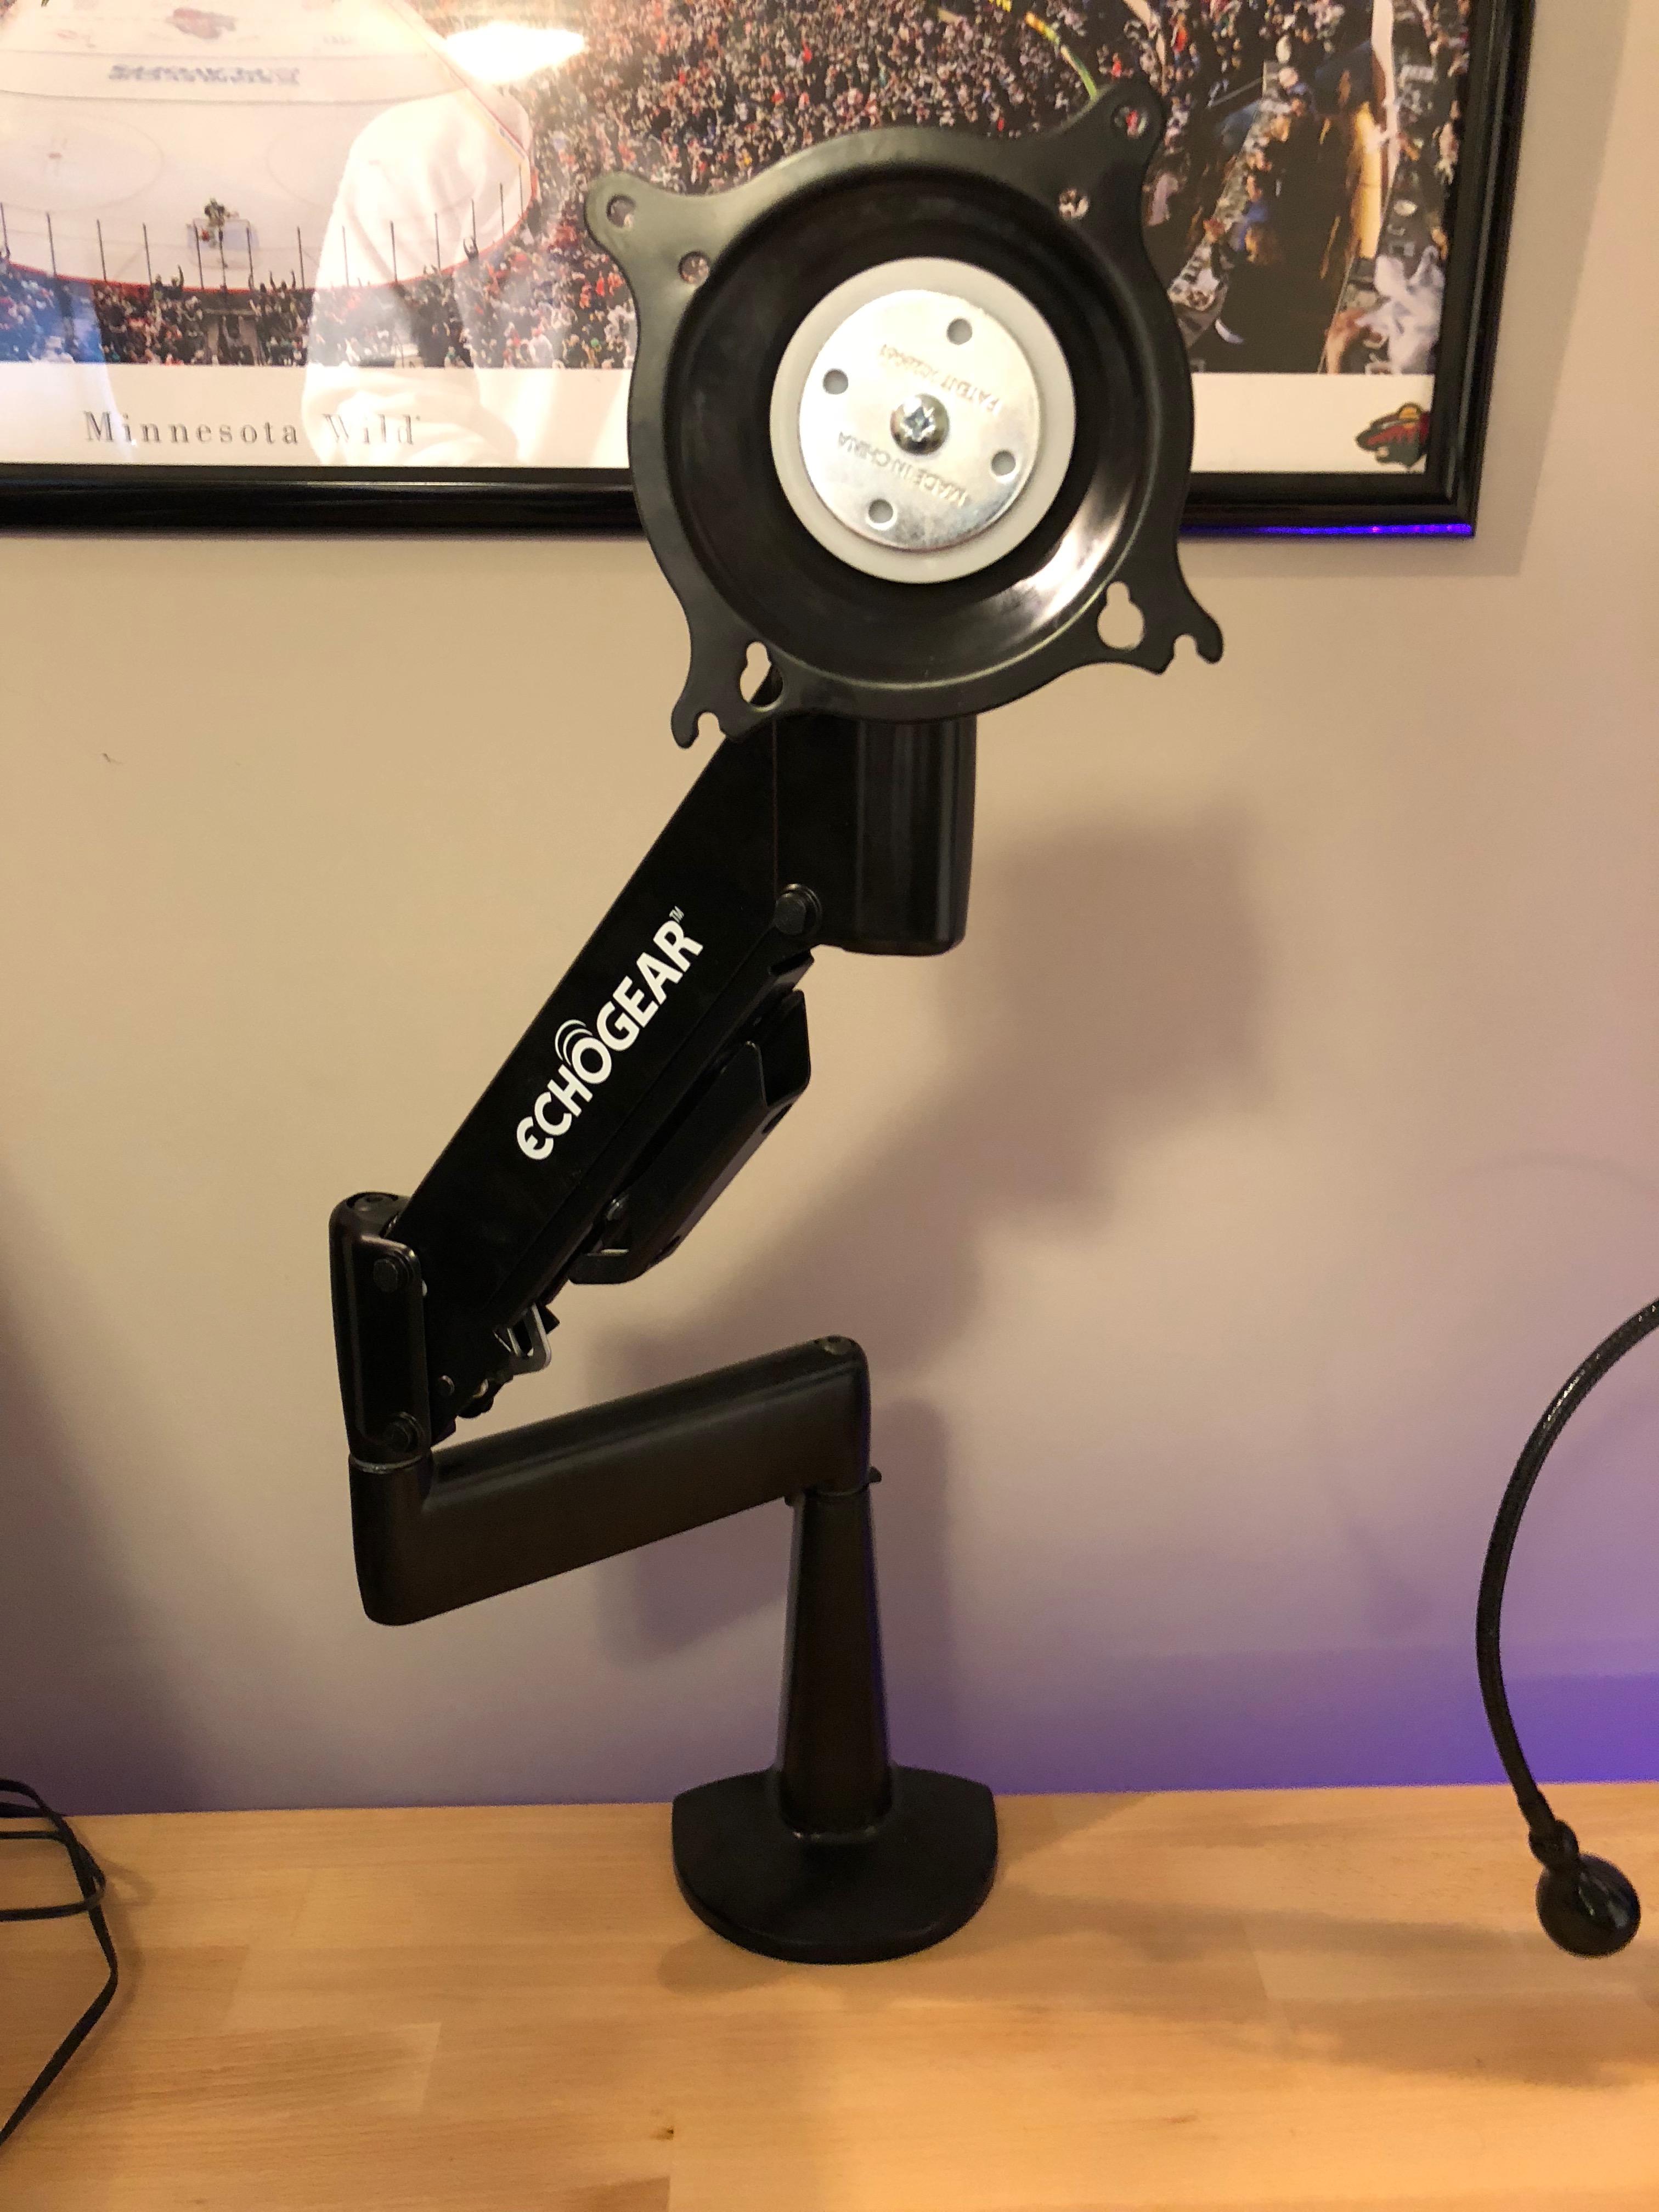
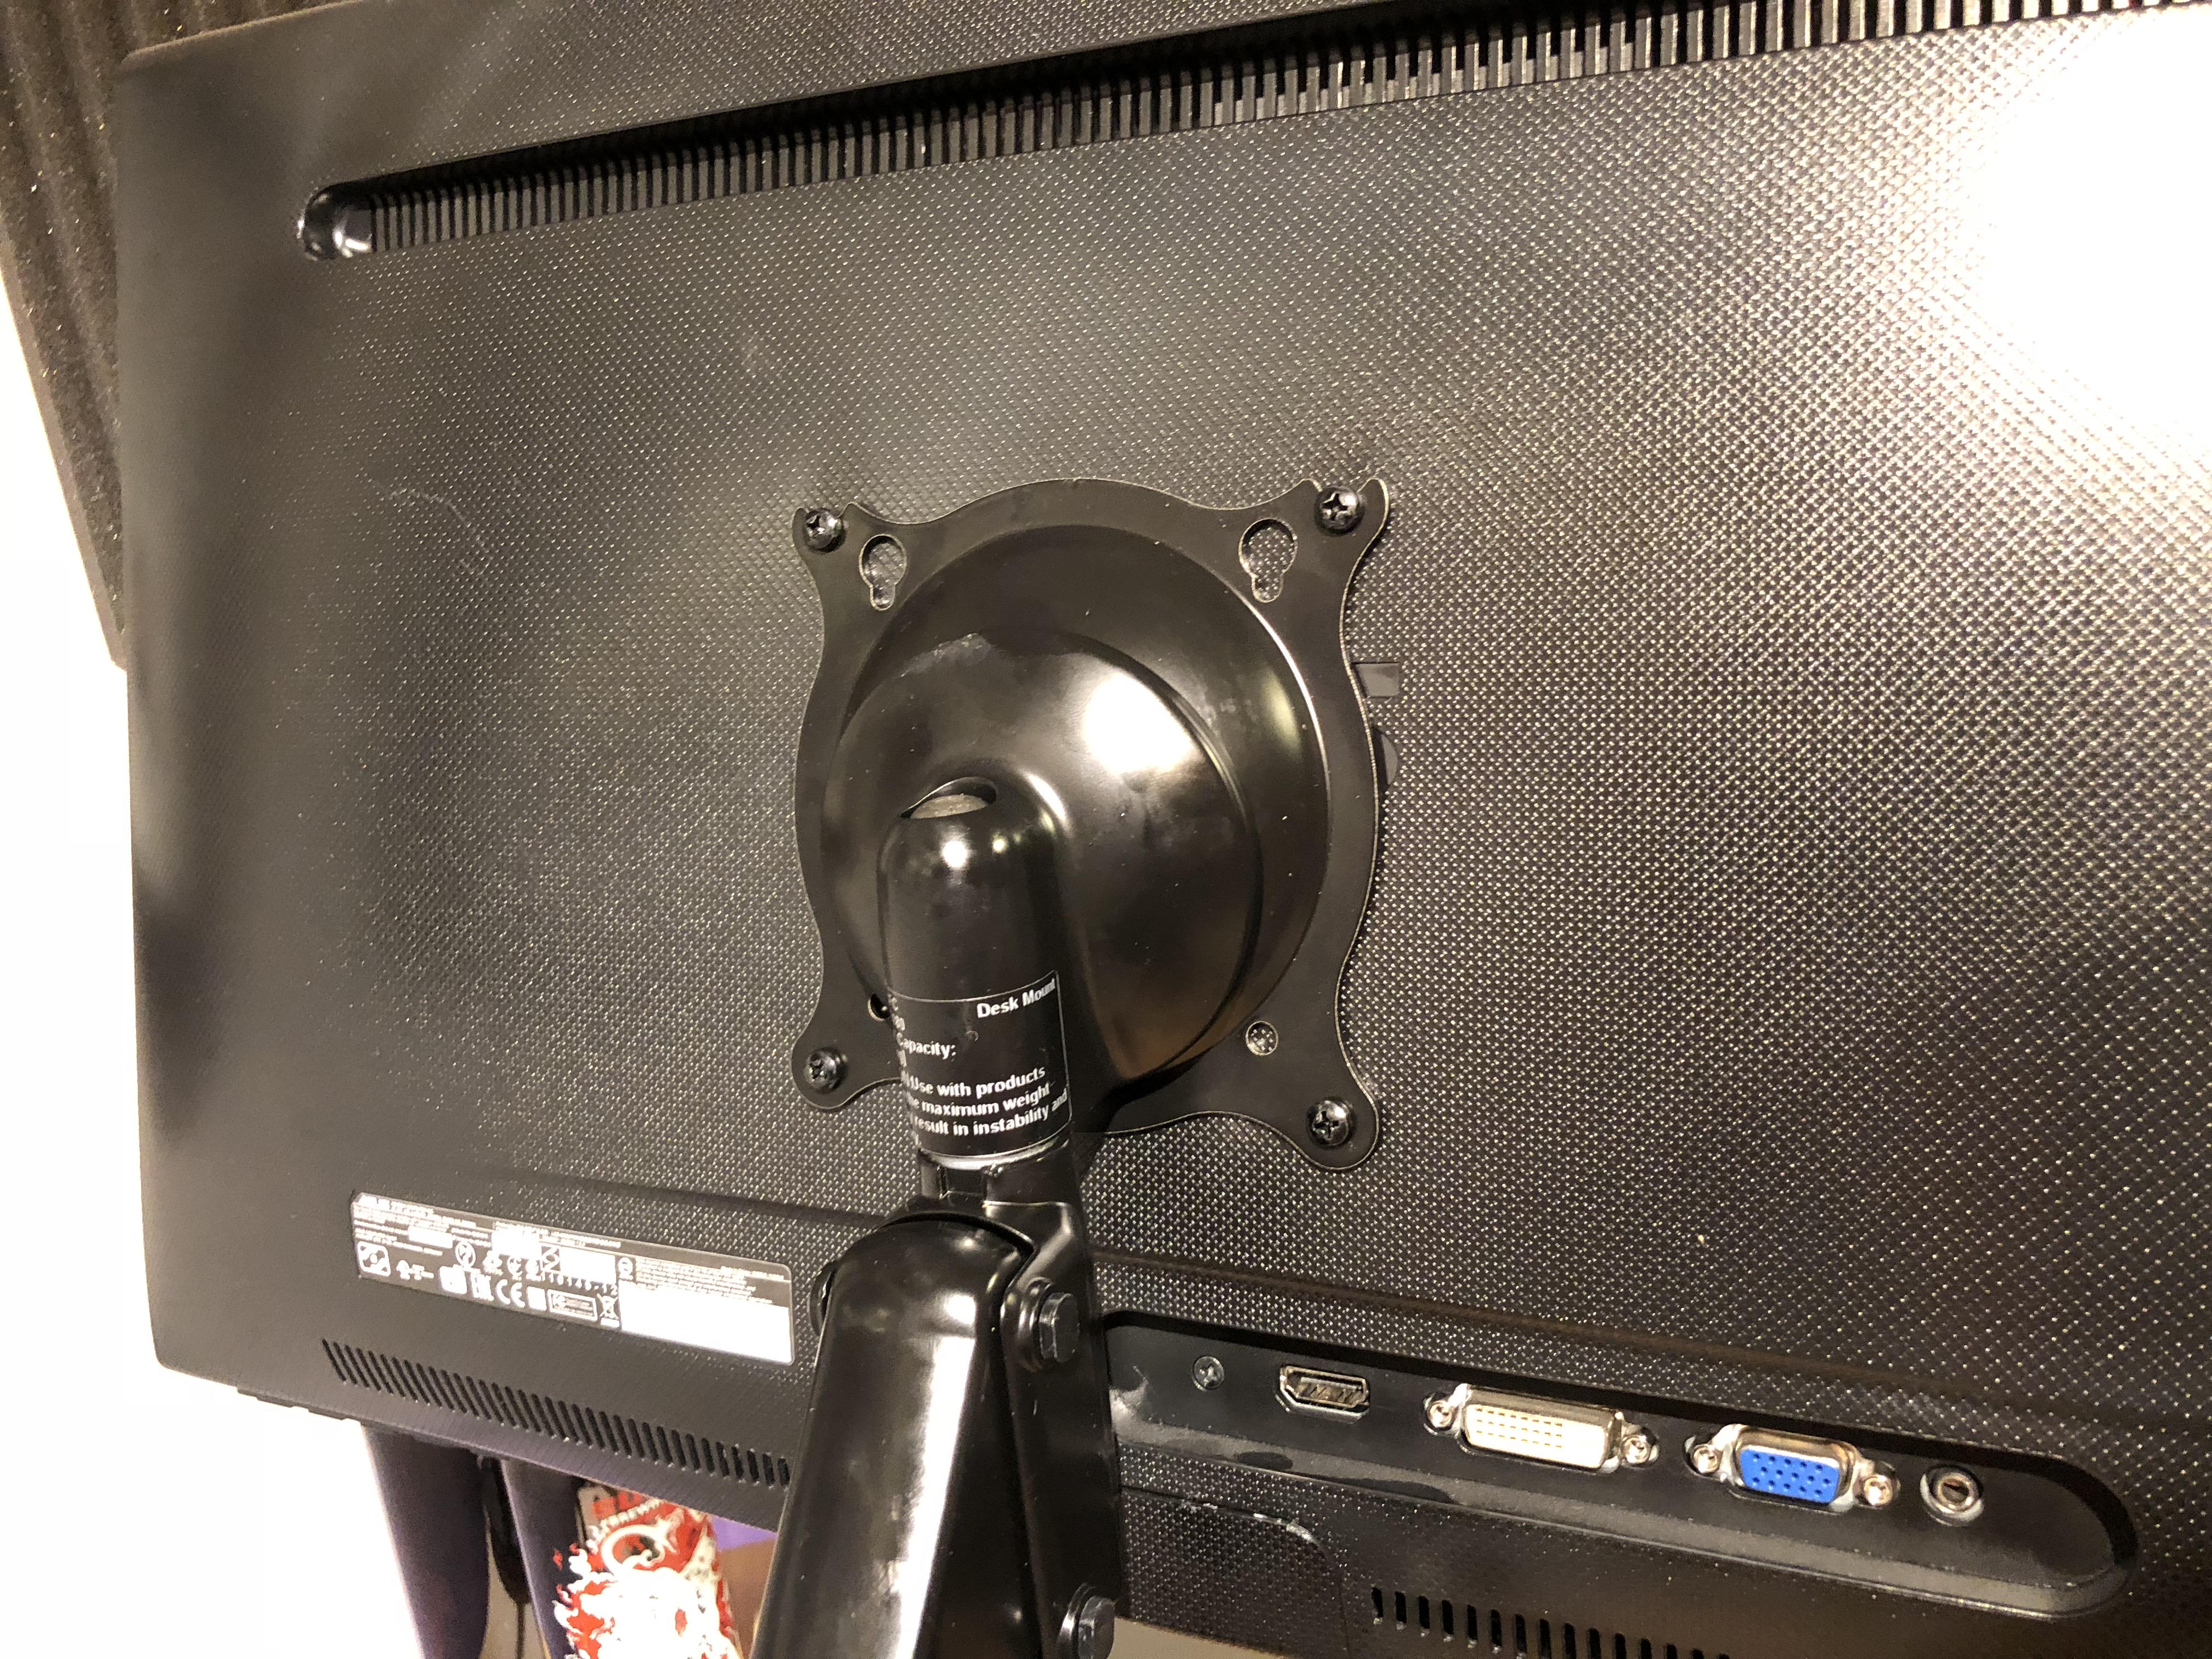
Step 2: Connect The Arm To The Screen
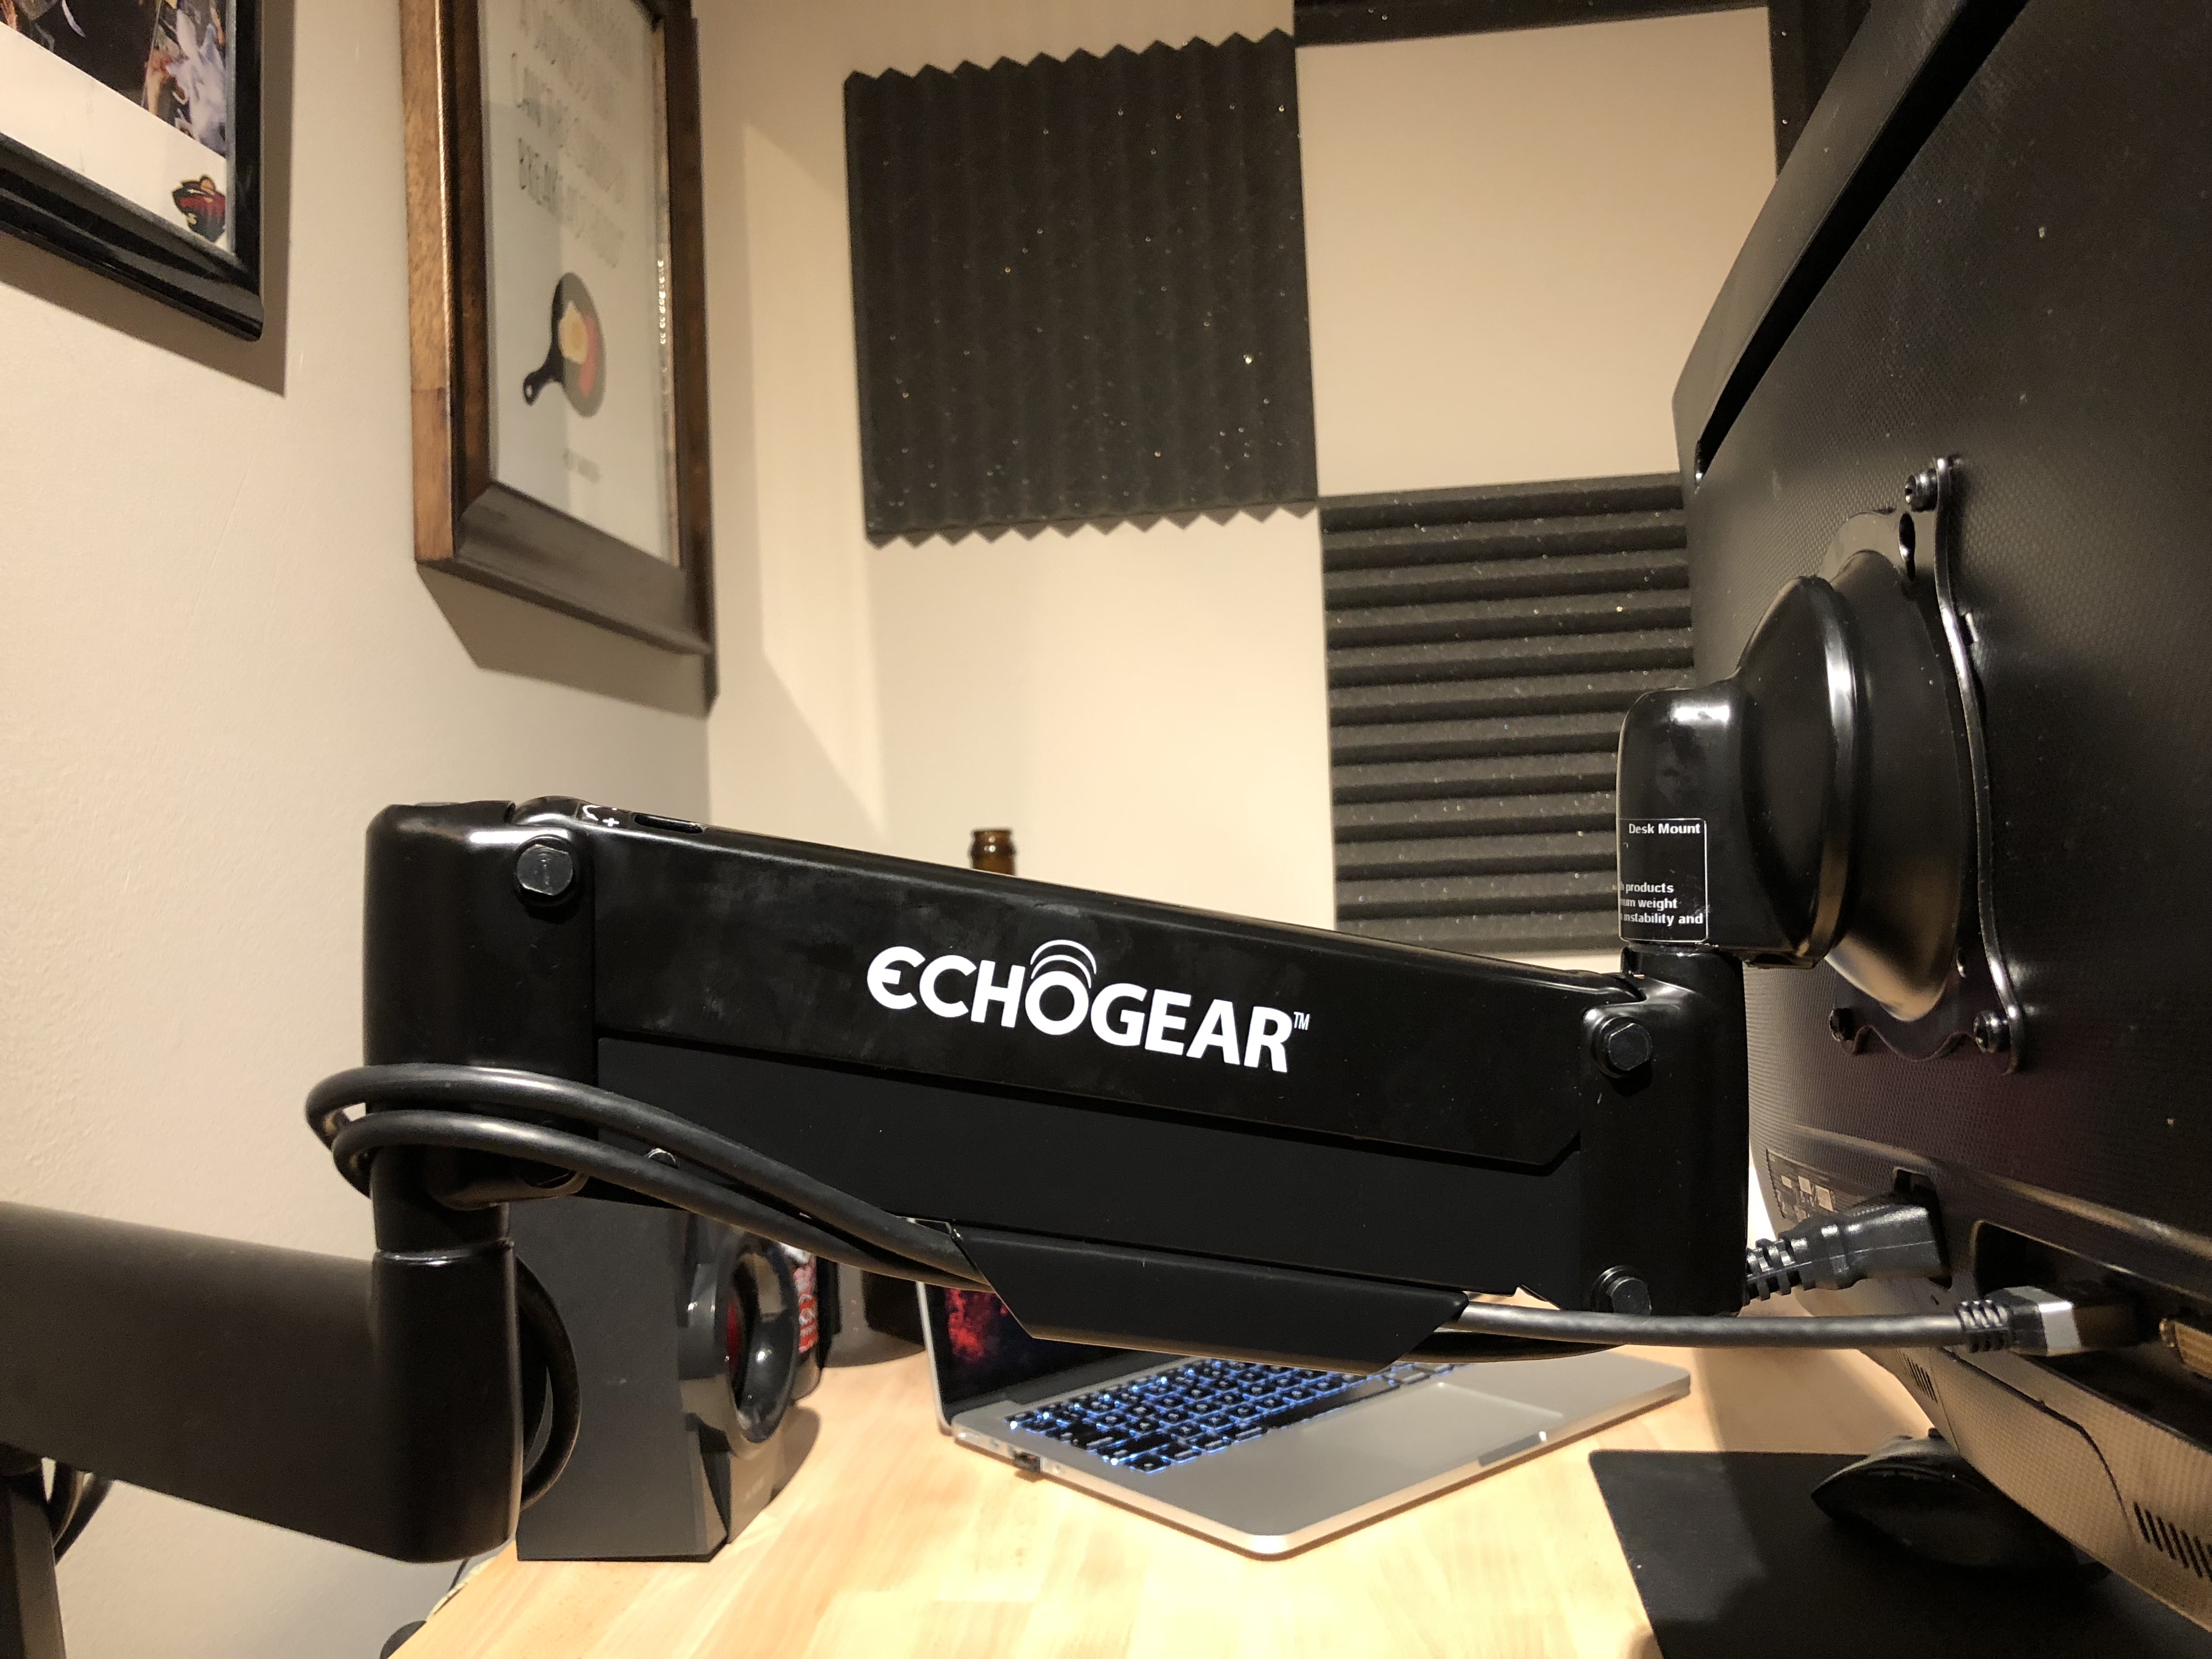
Now you'll attach your screen to the gas spring arm. You'll need a Phillips screwdriver for this part. Hopefully, you've got one of those. Put the screws halfway in with your hand, and hang the screen on the interface. Now you'll be able to put the screws in the bottom hole and tighten all 4. Not sure which way the interface goes? It should look like this with the half holes on the top. That's what lets you hang the monitor before completely tightening the screws. 2 person job? Nah dude, the interface was designed for a quick 1-person install. Now get back to Fortniteing (verb: to play Fortnite with heart & gumption).
Step 3: Manage The Cables
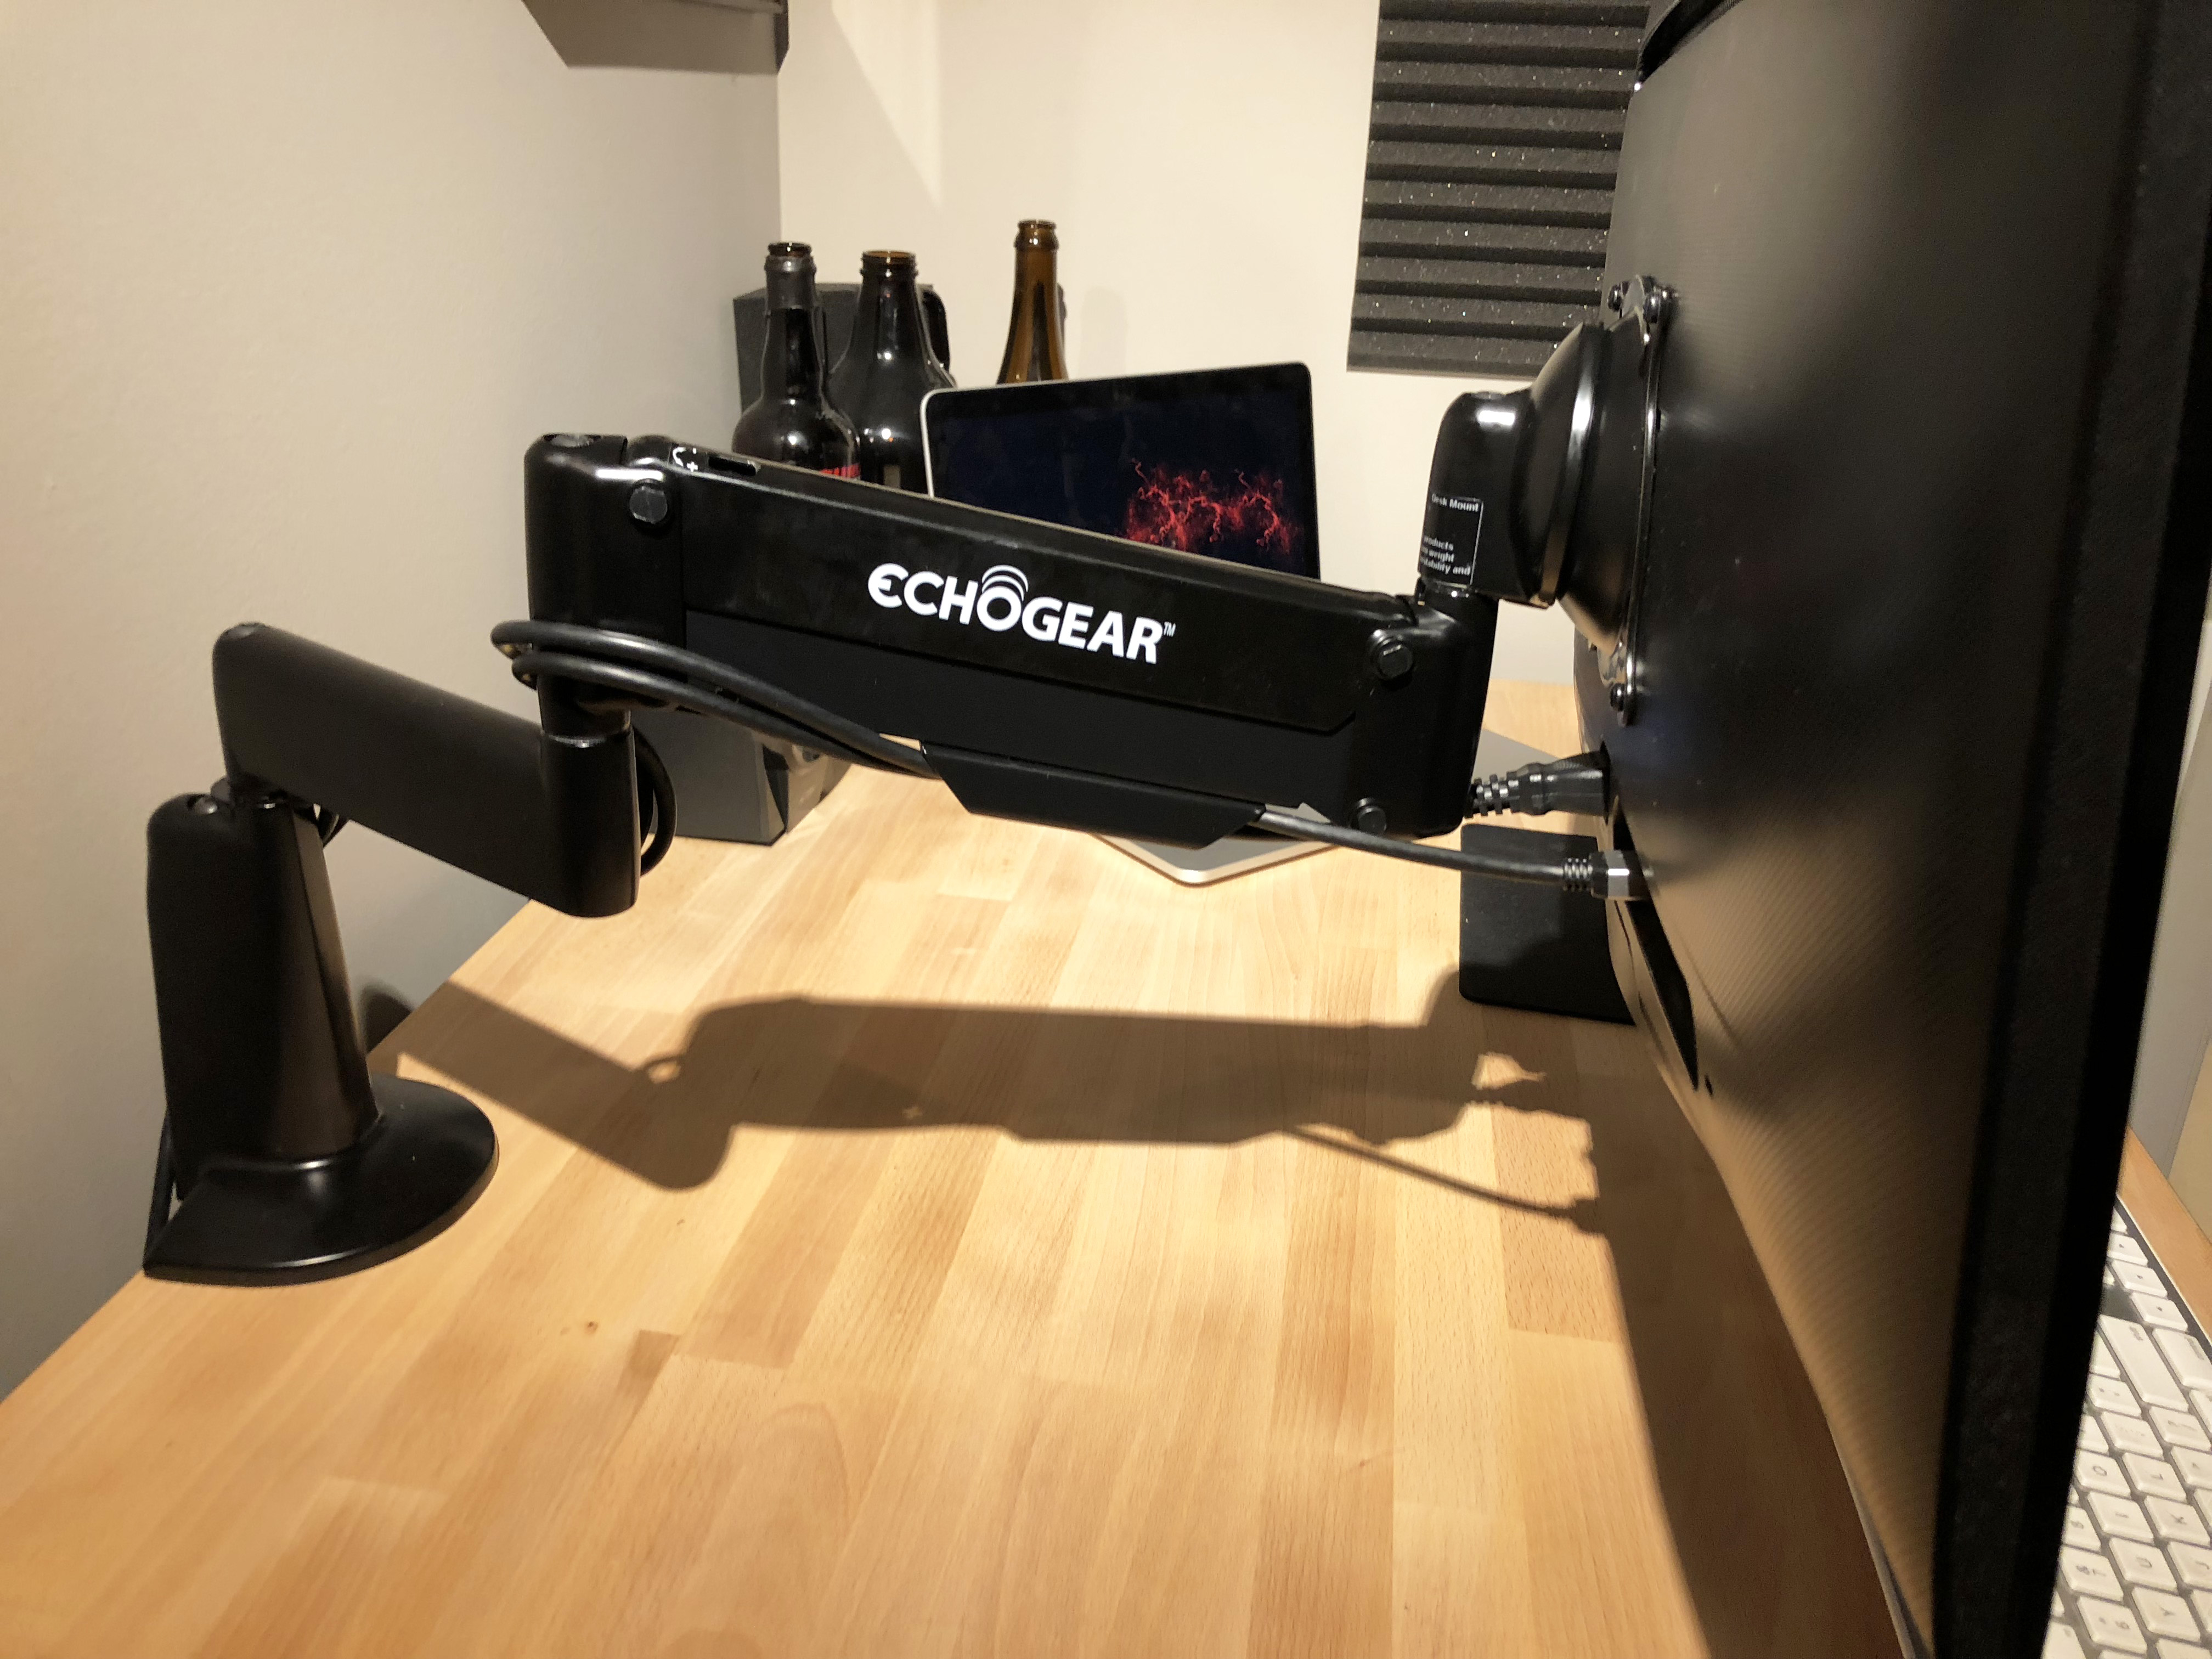
Now that the monitor is mounted to the desk, you can start optimizing your setup by routing cables through the built-in cable management channels in the monitor arm. I put the power cord and HDMI through the channels and there was plenty of room. Since the end of my power cord is large, I did have to remove the channel cap using the included tools to route the cables, but it only took a few minutes. I felt like Tony Stark taking his Iron Man suit to the next level here, tinkering with the cables until they were just right.
You route cables through the top arm, around the joint, through the bottom arm, and down the back of the mount. Pro tip: make sure to leave a little bit of slack between joints for when you raise and lower the screen. An easy way to make sure there's enough slack is to fully extend the screen up before you start routing the cable through. If there isn't enough slack, your cables could get pulled out when you extend or swivel the screen and that sucks. Take the extra few minutes to set it up correctly and save time later. Time you can use to Twitch stream some Dragon Ball FighterZ Piccolo mastery your 15 followers. But hey, that's 15 more than me.
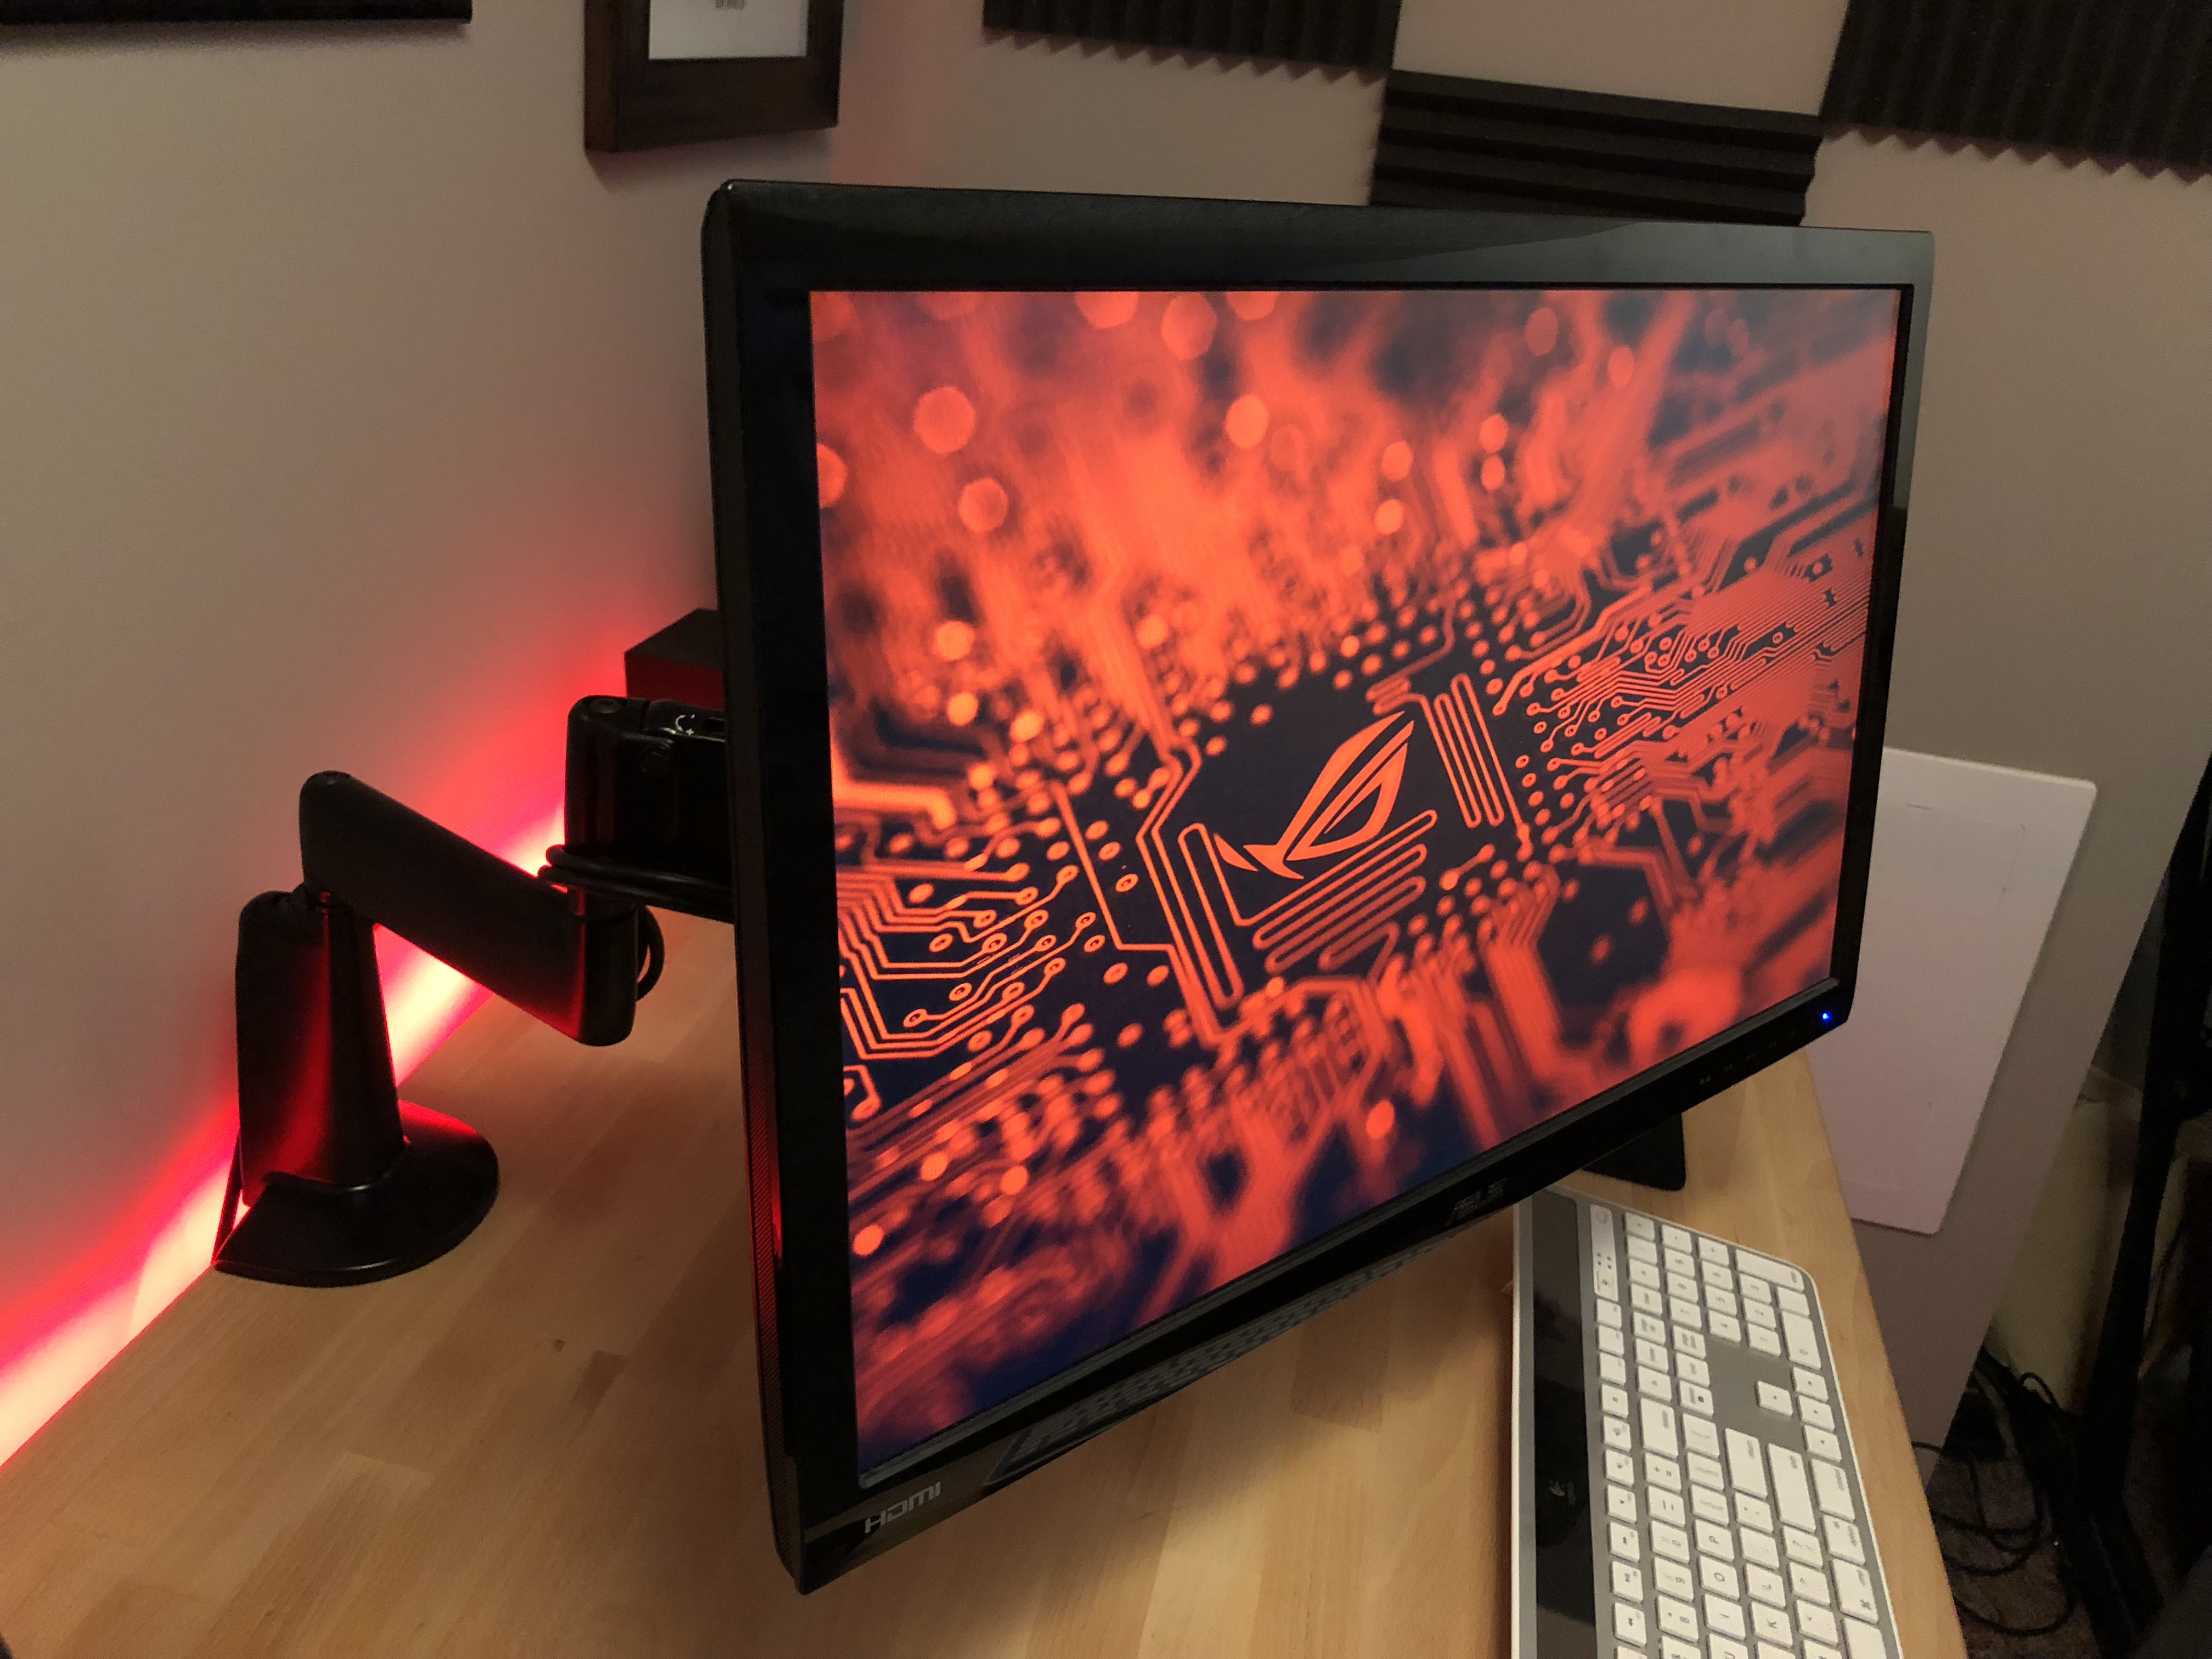
And.....you're done mounting the monitor. There are some tension adjustments you can make to get the perfect customized functionality, but you can read the manual for that. It's the easiest thing you've done since buttering your Pop-Tart (try it) this morning. Now your monitor has the footprint of a baby deer and you've got plenty of room to add new accessories. Your welcome. Oh, and don't forget that now your monitor can extend, swivel, and tilt to the perfect angle. Look at that beauty!
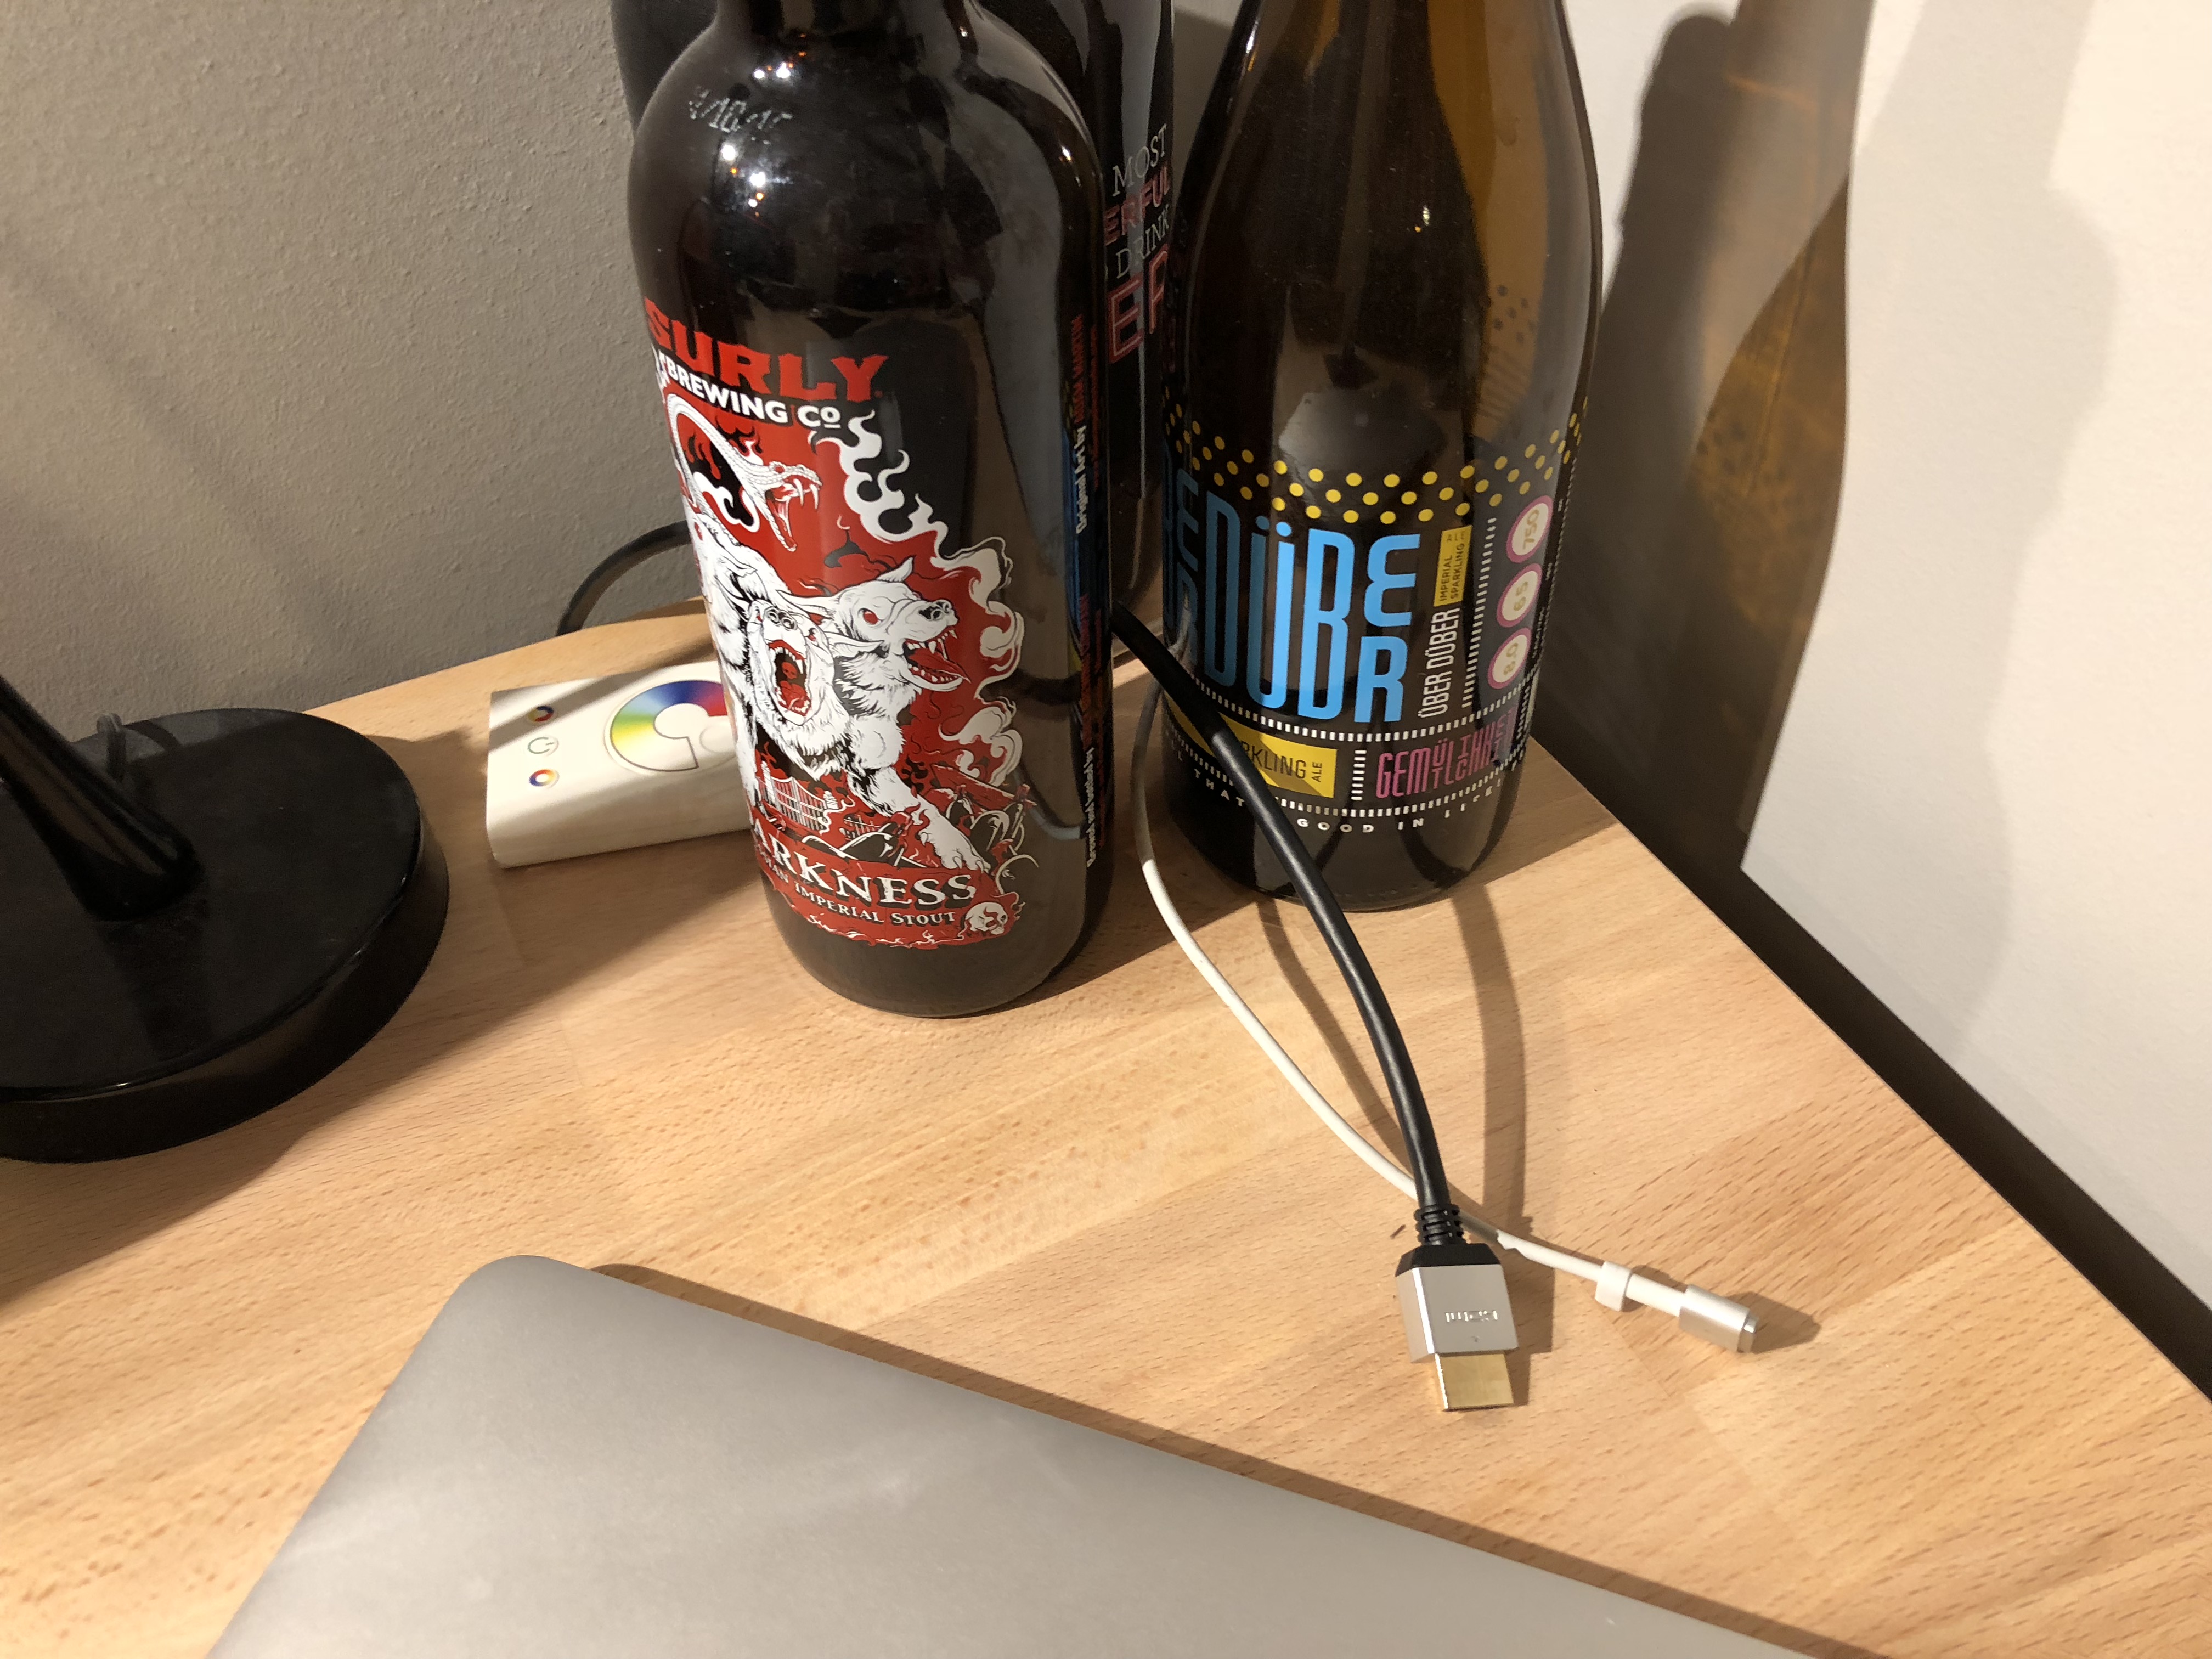
Now comes the time to clean up the cables and finish the project. It can take a decent gaming setup to the next level. Clean lines + cables out of sight + LEDs = a sick setup. I did the math. Before this blog, my cables were being held up by some empty beer bottles so you know it was bad. At least one of them was the delicious and boozy 2016 Surly Darkness straight outta Minneapolis.
I routed the cables along the back edge of the desk using the cable clips from earlier. They are easy to peel and stick, plus are rigid enough to hold multiple cables. In this photo, it's holding an HDMI and the laptop power cable without a problem. Some cable clips can be too narrow and not allow the cords to slide. Luckily these are perfect for cables that might need to move. When you raise and lower a monitor the cable will need some wiggle room.
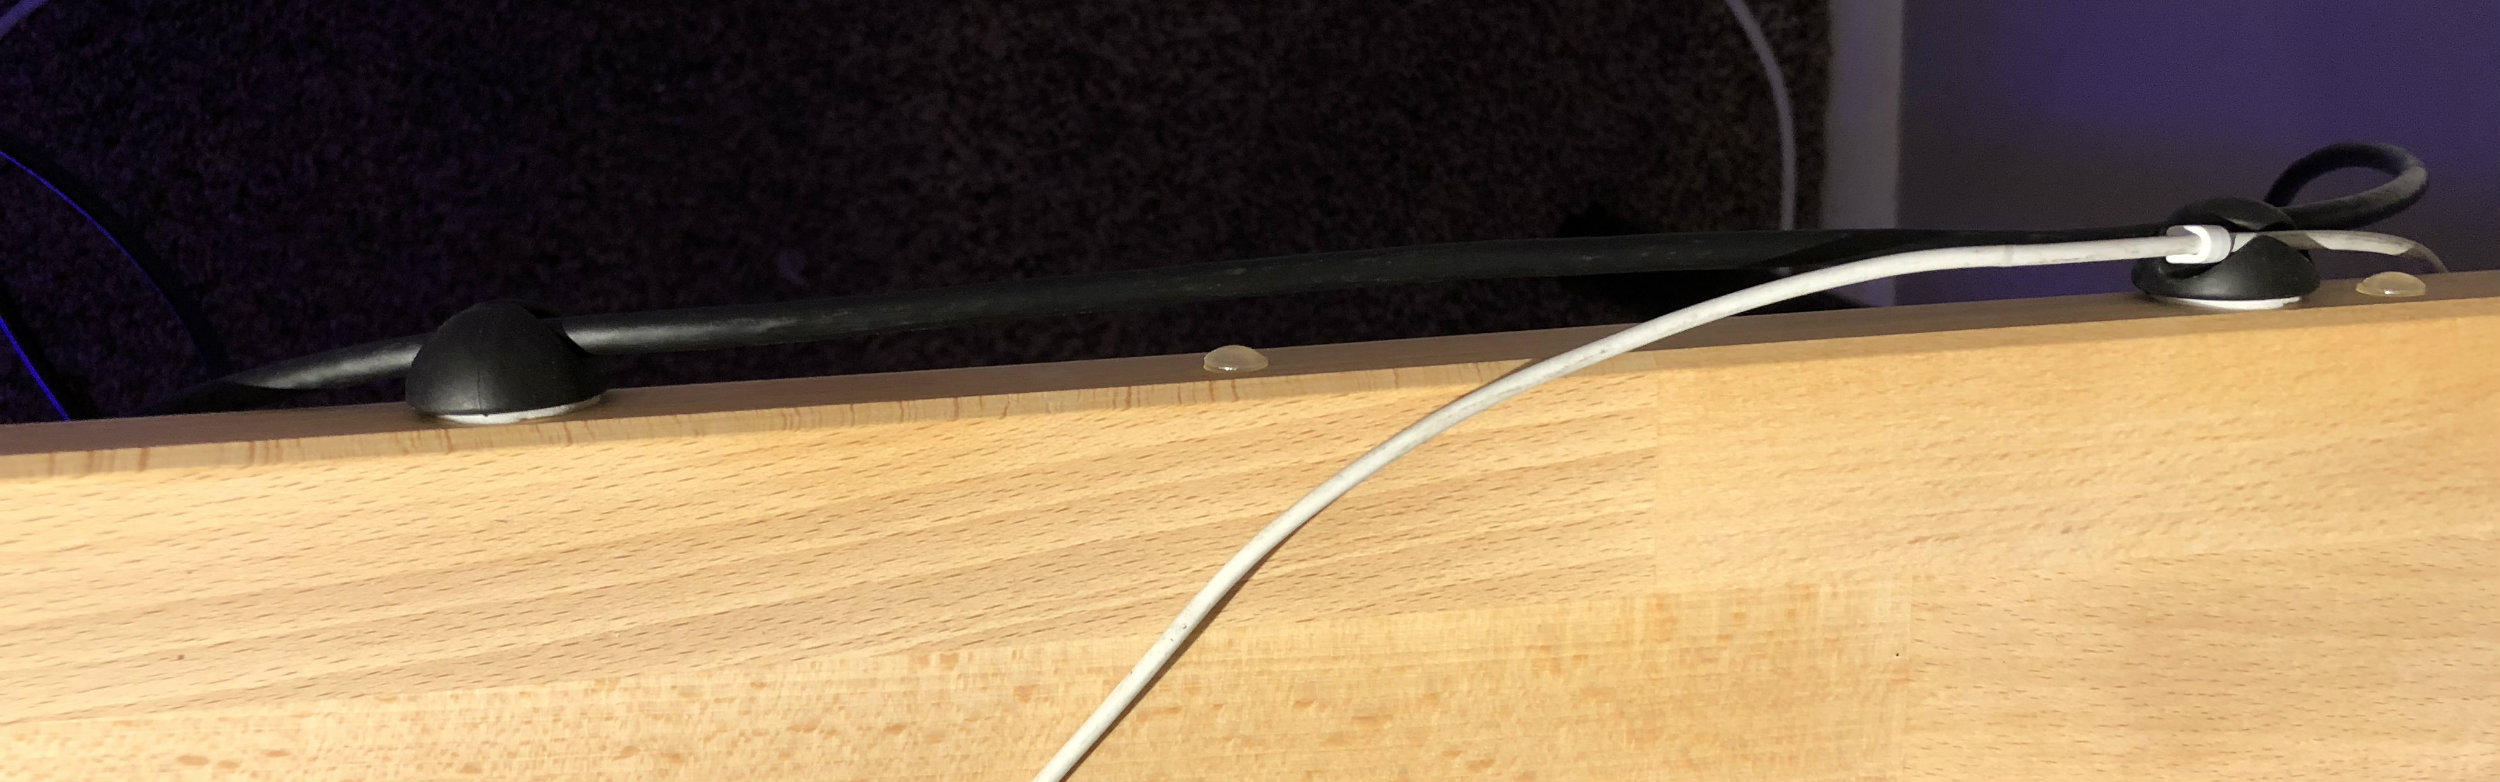
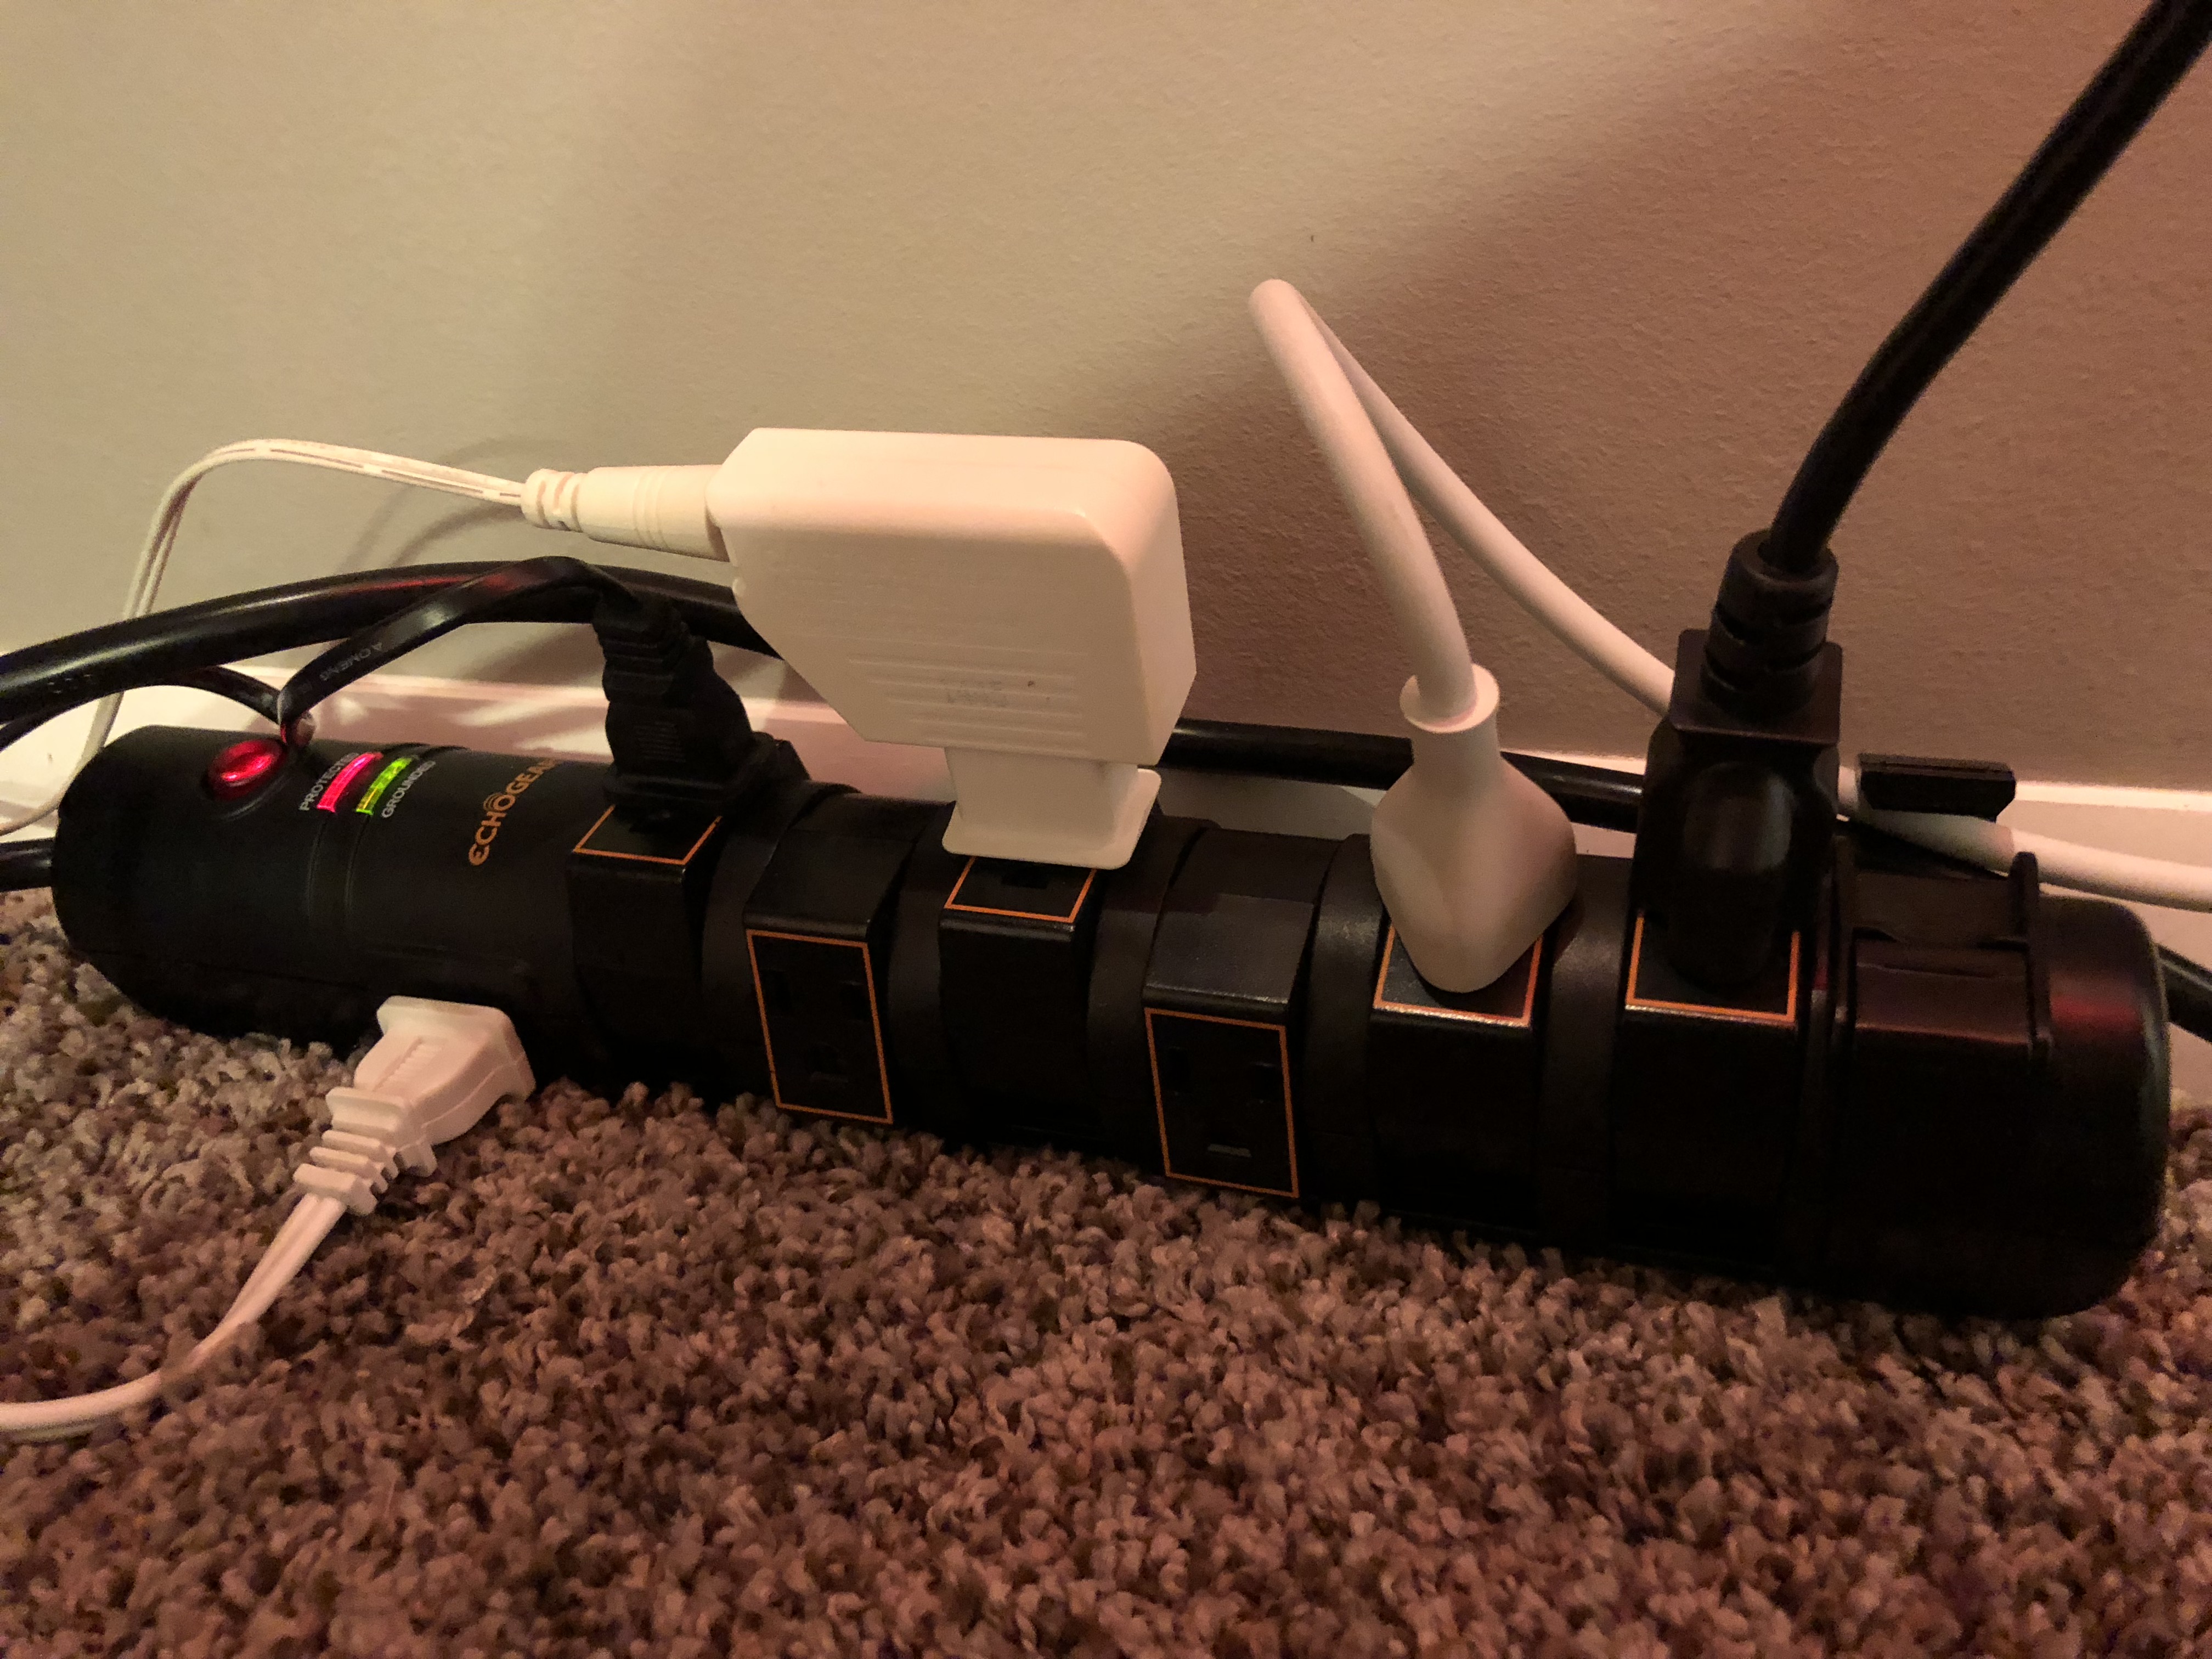
I used all 10 clips and the results were pretty dang good...at least above the desk. Below was still an abomination. Using the cable sleeve helped clean up a lot of the clutter. It easily held the 4 cables that routed up from my surge protector. Speaking of which, here's another shameless plug for you. If you're having outlet related terrorism, we've got a sweet surge protector with rotating heads that can accommodate up to 8 devices while protecting them with 2,160 joules of surge protection. Which is a lot of Joules. I was able to power my entire setup (lights and all) from one power strip which went a long way in cleaning up the cable mess. But don't take my word for it, it's got a 4.9 star rating on Amazon.
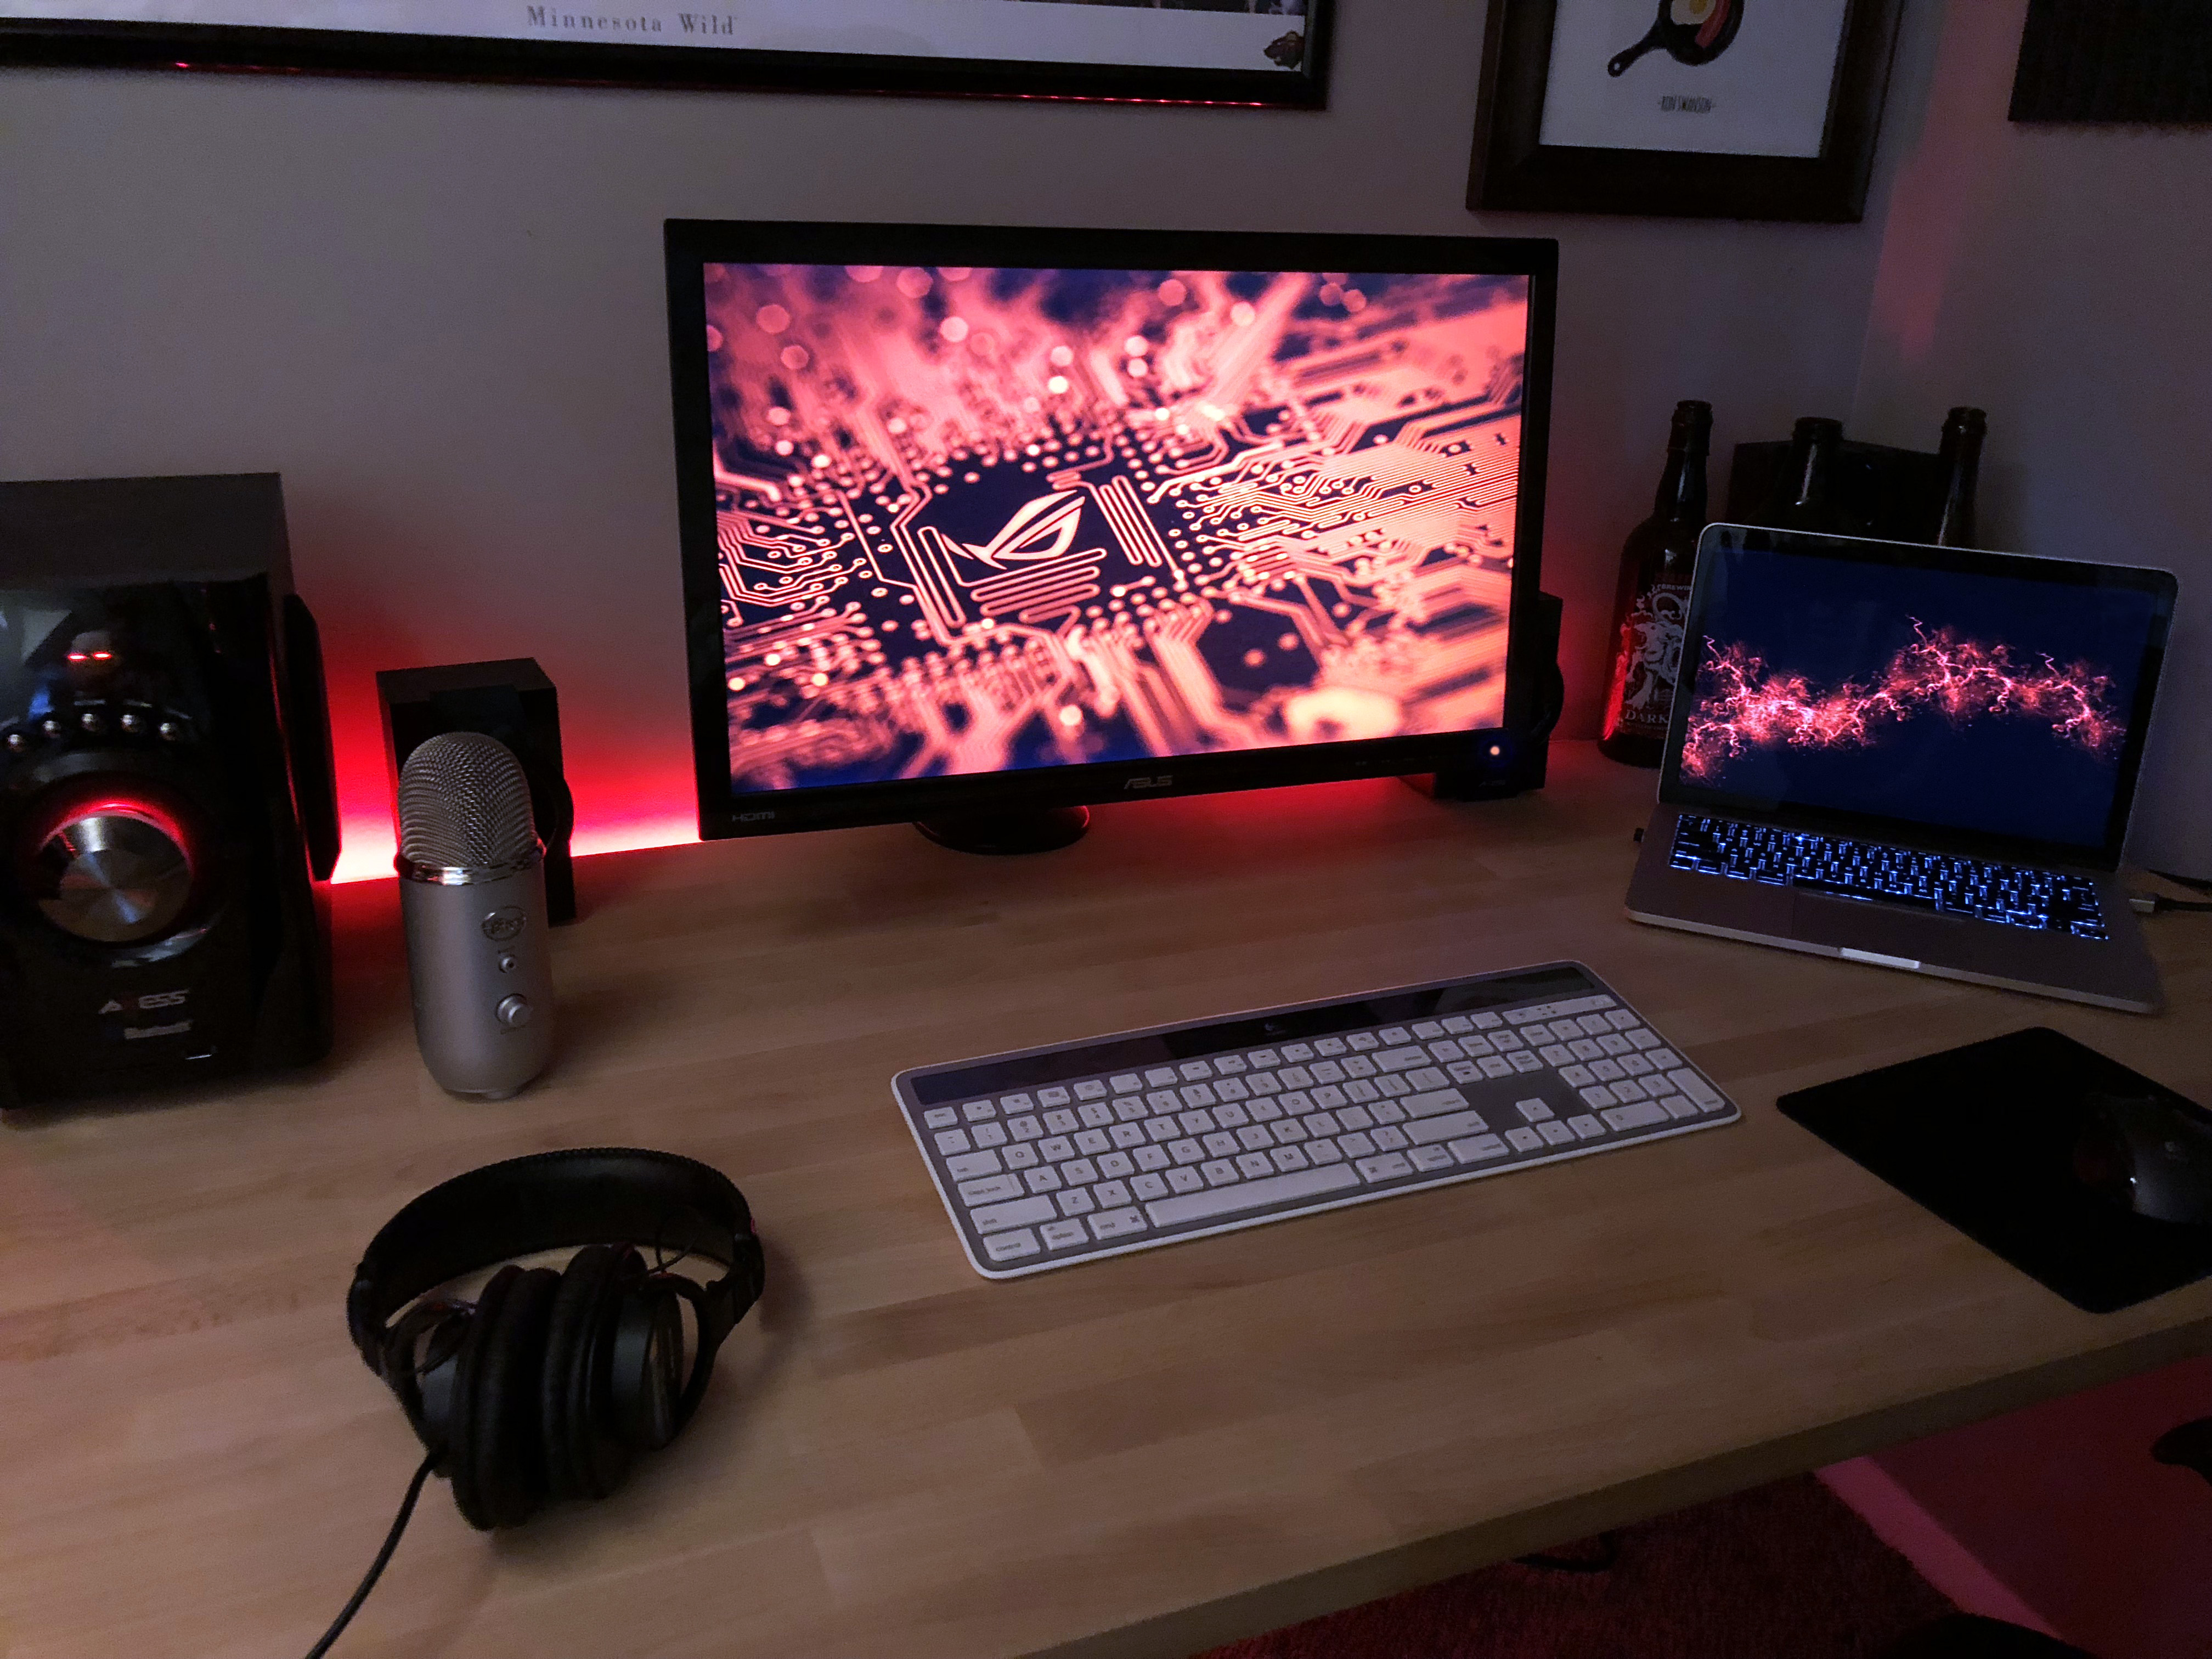
And that's pretty much it. My desk is way less embarrassing now. You can easily enhance your gaming setup by adding a monitor mount and cleaning up some of the cable mess. It doesn't take much time or skill and will give you both more desk space and nearly infinite monitor adjustments. And now, here is my favorite photo of my new and improved setup. Pretty badass, eh?